Adding to Cart…

Licensing Agreement | Terms of Service | Privacy Policy | EULA
© 2025 Daz Productions Inc. All Rights Reserved.You currently have no notifications.

Licensing Agreement | Terms of Service | Privacy Policy | EULA
© 2025 Daz Productions Inc. All Rights Reserved.
Comments
This is the skin set prior to any photo resources added. I used the Incandescent Portrait Lights for this one.
Of course, the normals, bumps, spec, high pass maps will be updated, but only after the diffuse is completed. He's glossy right now, but that's ok. The eyes...meh.The blue I like, but not the scleara. Or the setup. The eyes, for me, are usually second to last. Last being the gens area (which, of course, I won't post here-but the process will be the same).
*more to come later!
It's really interesting to see how this all comes together.
One question: what's a "high pass map"?
I always enjoy watching your worflow and see how everything comes together.
Thank you!
A High Pass map is a texture map that I make to place into the Top Coat Height slot in the surfaces tab. I learned this technique from ...somewhere. lol Either CGSociety or another professional computer graphics company's website a while back.
Here is an example- if you click on it and enlarge it you will see the section of the thumb that I clipped from the arms high pass material file in PS.
This can add additional, if small details to the skin (more with higher settings) with the height/depth areas like cracks and crevices while rendering.
Surprise freebie (Just because) - The KittieGlobe! I've also added this link to the first page of this thread as well.
Five colors and four emissive presets: 25, 50, 75, and 100%.
aaww... that's so cute. Thank you *happy smile and hugs*
Aww that's so cute DM .Thanks a bunch !
Welcome!
Oh that's so cute! I love it!
Thank you!
..it's nice once in a while to try something and have it come out the way it was intended; cute, not creepy. XD
Thank you, I love the little guy.
Mary
Quick poll regarding the KittieGlobe!
https://linkto.run/p/G2PNFBVL
I'm being evil and voting yes, yet comes here to make suggestions ;P Snake, wolf/dog and ferret that I always suggest left and right lol
How about 'Hello Kitty' and 'Keroppi'-ish?
lol- thank you both. I'll keep tabs on any suggestions and see what we come up with before I make a list of props. ;)
Tomorrow night- I'm going to switch from skin (I just lost all of the work I was doing tonight due to a crash and corrupted file and now have to re-start the process) to the props that are (hopefully) going to be included in Mikhail's character pack. I'll post WIPs during.
...well that didn't work as planned, so the next try at the prop idea I'll save the process to share.
Today, we are going into Blacksmith 3D with the base texture files to start on the large areas of the skin texture to projection paint from the photos.
So the first thing I do when I start on this process is open Blacksmith 3D and save the file into the character file on my desktop. Then, I open Studio and load G8M from the developer kit; No morphs, no skin textures/shaders, no lashes.
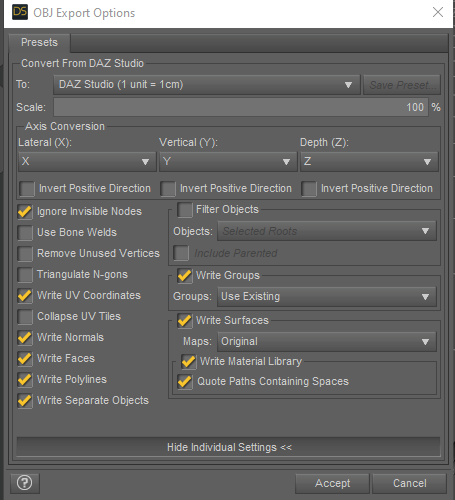
I use the default Studio export settings and save the figure as g8m no gens. I do this twice, once with no gens on the model, and a second time with the gens on the model (to fix seams later-there are always seams with the gens geograft) and save both into my Blacksmith 3D process file and close Studio.
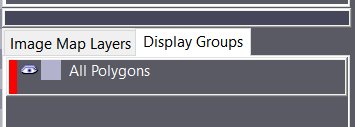
Back to B3D: once opened, I always try to click on the Display Groups tab when I load the two object files (I do forget at times and have to start over) before importing the files into the program.
Then it's Import>g8m no gens into the program.
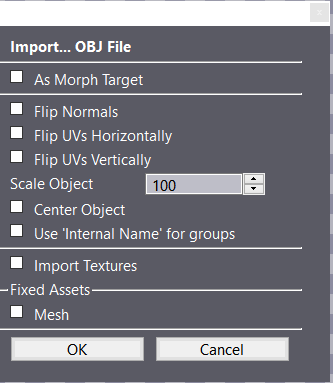
The window that pops up will have "Import Textures" checked- I uncheck it so I don't have to go in and delete all of the texture maps that come with the export process.
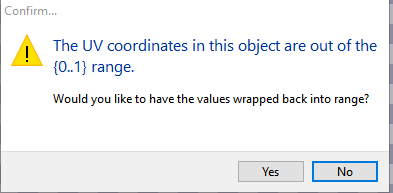
Then this window pops up- always select "Yes".
and now we have the first object in B3D.
This is the part I had to learn/remember when I first learned about this program: Select Edit>Select>Select All. The we go back to the Display Groups Tab, right click, and select "Create Display Group". There will be a second line under the Display Groups Tab below the "All Polygroups" called "New Display Group" that's been created, with the no gen version of g8m that was imported.
Next we will have to go back to the Edit>Select and this time select Clear All. This will now release the object file so we can assign the g8m gens object file to another display group. Right click on the eye to the left of the green box on the New Display Group layer, and hide the first (no gen) version.
Next step coming up!
whoops- um. See below. XD
Ok- using the same process above, I've added the gens object model into the scene and assigned it to the second Display Group. I've also right clicked on each display grouping and selected "Rename" to make the top layer "no gens" and the second layer "gens" (ignorning the first "All Polygons" layer at this point).
Hiding the "gens" layer for now, we go on to import the diffuse texture maps I've already made for Mikhail into the program. This is at the top right side of B3D:

Pretty self-explanatory. Right click, select "Import" and find the texture files you need in the library folder structure and import the face, arms, legs, torso, gens diffuse maps. You will have to do each one individually.
Next I click on each of the maps and hold the left mouse button down to drag the map to the corresponding portion of the model. Each time you will get a pop up window:
Now we will need to select the photo resource we are going to work with. At the bottom left corner under "Brush Tip" you will see a set of 2x2 boxes. The top left is the actual brush alpha, the top right is where we are going to import our photo resource, the bottom left is your primary color, and the bottom right is your secondary color. The colors we aren't going to worry about right now. For the top right box, you left click as usual to select your photo to use, and Alt+left click to clear it to choose another photo resource. I am going to work on the back area for now (I will not be showing every process for every area, as the process is pretty much the same for each), so I selected a well lit and cropped in shot of the upper and mid-back and shoulder photo.
With B3D, we can choose our viewpoint as well at the upper left hand side of the program screen:
While with another selection that can be clicked on to be able to move the figure around to choose different angles, starting off it is good to use the front/back/right side/left side/top/bottom selections so the figure position can be matched up to the photo references. So, I click on the "Front" tab and select "Back" instead.
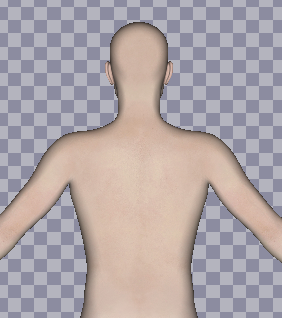
Here is the viewport (The full figure is there, but for TOS, I'm cropping the screen clip):
Now, notice that the arms are not in position as the photos- that's ok. I am going to work on the actual back, back of neck area only, so the arm positions don't matter at this point for the shoulders. I may reposition the model in Studio and re-export it out to match the position of the photo, or use the clone brush in B3D to cover the back of shoulder areas.
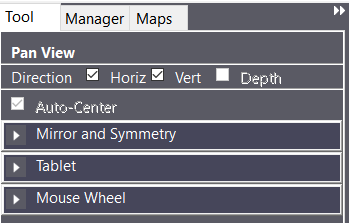
The clip below shows the view and viewpoint buttons in B3D. From Upper left to right: Pan View (Once selected you can click in the applicaton window and move the view on the figure up/down/left/right), Zoom View (This, once selected, you go to the application window, click, and drag up for zoom in and down for zoom out, or you can use continuous Zoom, which I don't.), Rotate View (Select this, and click in the viewport an drag to rotate the figure model in any direction for those hard to reach areas), Frame Current Viewpoint (This, when selected, will take your current viewpoint and zoom out or in to frame the entire figure into the application window), and Frame All Viewpoints (I've never used this, because I don't use multiple viewpoint windows, but it's the same thing as the previous framing selection, but for all of the viewpoint windows at once). These are your navigation buttons in your workspace.
Now, back to the figure itself. I use the pan and zoom to kinda get the back of the figure into most of the viewpoint screen so I can see what I'm doing.
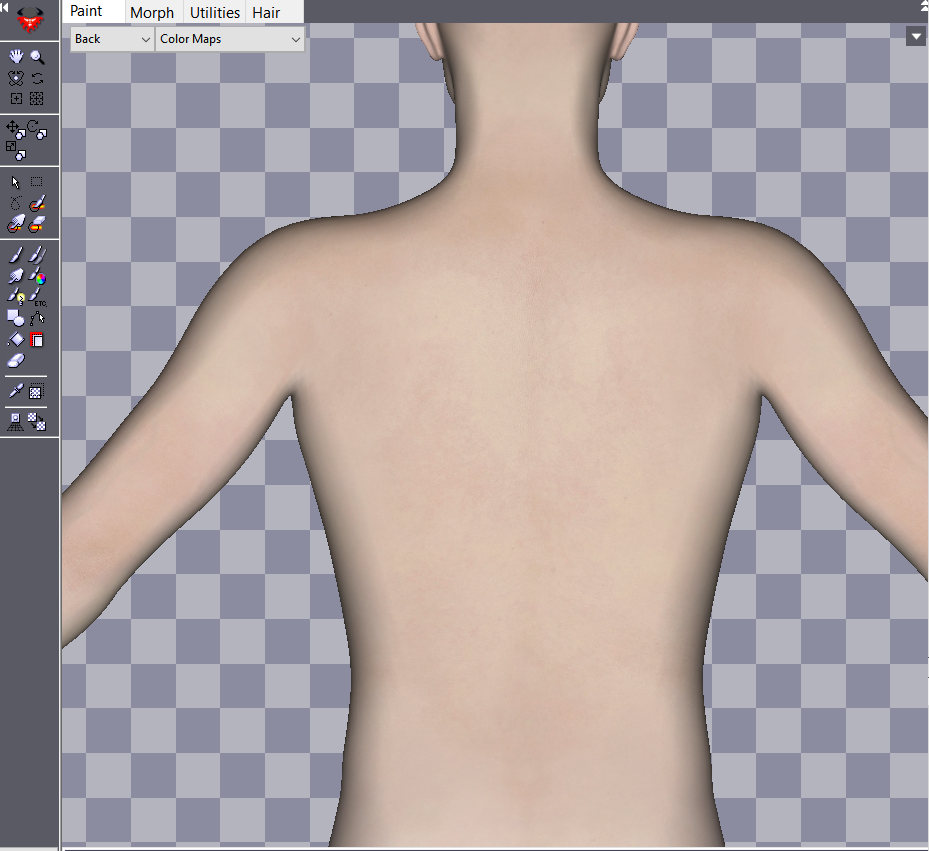
Since the photo reference is already loaded, and he's in position, it's time to select the projection brush: The icon to the bottom left icon is the projection brush so we can paint the photo reference material onto the model in the viewport. Click on the bottom left TV looking icon. The Tool tab at the right side of the program will be activated with the tool information selected-in this case, projection brush.
The Spacing number has been lowered to 1: The lower the number, the smoother the stroke. The Resolution number has been changed to 1000: This prevents deteriation of the photo resource while projection painting. Note: Higher than this and my system locks up B3D and I have to do a hard shut down with the task manager. I also select Fade By Angle at the beginning of this process; what this does is prevents the projected photo textures from being painted on any curved surface area such as the ribs, hips, shoulder and back of the neck. The areas where this prevents the textures from being projected on stretch very badly and I'd rather go in with the pan and rotate to do those specific areas, or use the clip/copy/paste method in PS if it's not on an area where there are seams.
And for some reason, cloudfare has blocked me from adding further comments (I must have accidentally hit a sequence of buttons in my half-sleep state) and I have to type, save draft, post comment or type, save draft, restart, post..so the rest will have to wait until Daz can remove the block with the info I submitted on a ticket. Sorry!
A mouse lamp would be cute!
Ohhh an in-depth tutorial on doing skin textures in B3D. That 's awesome thank you for sharing and showing! Makes me want to go play in B3D now.
Do you have any recommended settings for using a skin pattern brush in B3D ?
Cloudflare will block comments that look too much like computer scripting or programming language from being posted to the forums so that's probably the cause.
Thanks for the overview! I've always wanted to try it but my very bad attempts at trying to pixel paint a dog breed coat had me thinking you all must somehow be transposing real photos directly onto the material sets (or have much more patience to pixel paint then I do).
So in BS3D then you have a projector brush that copies from the picture reference and then you project it onto the character 3D UV projections? Still sounds complicated trying to line up multiple projections from the source photos to material set though.
Added mouse lamp to the idea box!
For this stage, I only use the base brush shown in the box. I play with the density number ranges depending on the blending I'm doing afterward, but for now- it's straight up as you see it.
Ugh. figures. Lol
Yes- in BS3D, there is a projector brush that will transfer the photo to the model; the resolution of the final product is dependent on the resolution of the photo itself that is the resouce, the resolutions of the base maps (as I am using), and the resolution of the projection brush during the process. As for dog breeds..I'm not sure I'd use photos, since the fur does tend to cause shadows and artifacts in the photos themselves. I think you're working the right idea. I'll get into the lining up the resource to the model in the next set.
Thank you :)
Was messing around with @Darwinsmishap new Character (Mason) and this is what I came up with!
That man is always getting himself into trouble and this time he broke his ankle trying to get himself a peek at a girl undressing at the club!
Cute, Saph! You know, maybe with the 3DL system you could put one of the 3rd generation eye materials on him that have 3DL so you won't have the black eye effect in your renders? Then you could go back into the material settings and change out the UV and texture maps to G8's (or his)? Maybe that would help.
Progress shots in B3D. I'll post the process, yes, but for now I have to get ready for work. Leaving out the TOS areas, of course. ;)
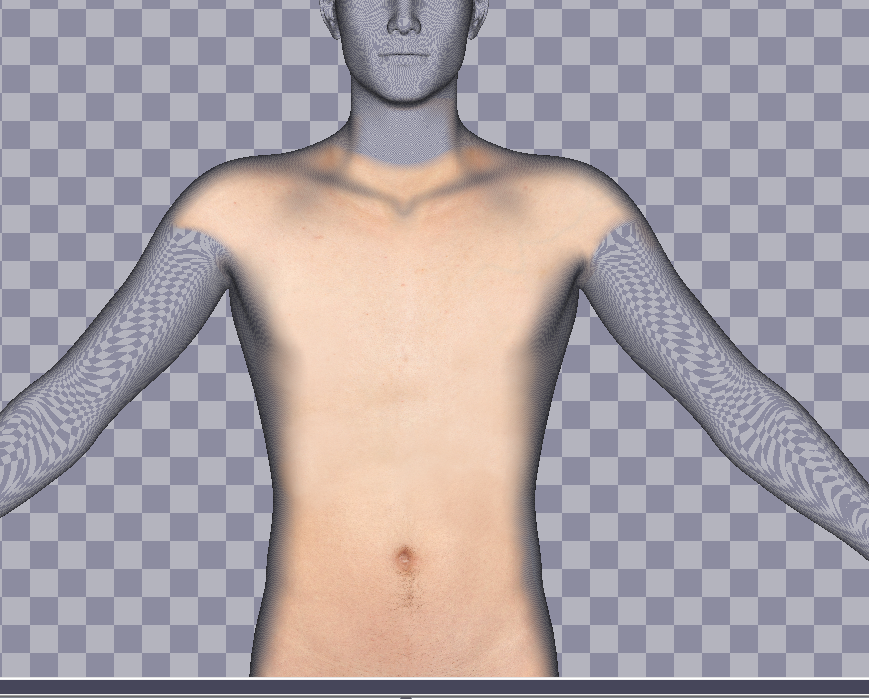
The seam areas, especially around the legs, will have to be cloned over to keep the leg hair from looking spasmatic. It's always an issue, and most of the time I can get them to line up enough that it's minimal work. Other times...I go for the shaved look instead- this is one reason why when I work with photos, the guys have no hair. lol It can be a headache.
Here we can see how the "Fade By Angle" selection works in the projecton painting. The further away the model is, the less projection painting goes onto the polygons. This way I can find a side angle photo and use those to paint over the area on a new layer, and then erase areas to blend the two layers better, and then clone over the areas that cause issues. The inside of the legs aren't so easy for me, but that is another step with exporting/importing the model with a different pose since the photo references I have do include the inside of the legs-at least at the thighs and feet. The calf/knee area I can pretty much clone over if need be, I think.