Question about lighting.
I have done about a dozen renders now (mostly working with posing and learning the controls, getting a feel for how it all works) and some feedback i got on my renders was that the characters and environment looked "sorta dull" and I agree! The person asked about my lighting set up and the thing is, i didn't have one. Apparently my lighting was just the camera headlamp. So I found a good tutorial that even gave the transition/rotation parameters for Fill, Key and Back lights. The results were better but obviously specific to the render in the tutorial, not mine. I am guessing that lighting is a LOT of trial and error but I was just hoping for a few nuggets of wisdom, rules of thumb, stuff like that. So if there are any lighting wizards out there, any pointers you could give would be awesome. I know it's a deep and varied subject so let me help to limit the scope, the majority of my scenes take place inside and a few outside. Does that help? lol But seriously, what I mean when I say that is that I will be dealing in environments that have normal indoor lighting and occasionally outdoor sun. I'm not working with candles and flashlights or fireworks. Just, ya know, normal lights and sun. Basic stuff.
Daz 3D is part of 
Connect
DAZ Productions, Inc.
7533 S Center View Ct #4664
West Jordan, UT 84084
Licensing Agreement | Terms of Service | Privacy Policy | EULA
© 2025 Daz Productions Inc. All Rights Reserved.
Comments
With Iray (or any physically based renderer), a lot of what you can learn from photography books or sites is directly applicable. Even with 3delight (bearing its own characteristics in mind), it is still applicable in a general way. It's art; not a cookbook.
I wasn't looking for someone to give me coordinates and settings for a camera. I just meant something like "Fill lights work best when closer to the ceiling" or "Try not to use too many point lights." I don't know if either of those things are true (doubt it) but that's all I was hoping for. Just things to keep in mind when setting up lighting.
There isn't a quick fix for lights as each render is different. Outdoor versus indoor; dark versus light etc. I usually start with an environment, then add some elements. I then adjust the light from the environment and the tone mapping settings to get the best light for what I am trying to achieve. I can't give specifics because it changes each render and also during a wip as I set things up. I can say it isn't all trial and error but it is based on my photographic background and based on my real world obervations. I try to get it to look as it would if I was actually there. Whether it works or not is a different matter
Fair enough :) Thanks for your input. I guess its just grunt effort that will get it done!
Although a very tedious process, but well worth the effort is, start simple. I set up simple scenes, a primitive cube and plane, observe how variations of light work on different mat surfaces. There are no magical method or steps to lighting, as you state alot of trial and error, what work's for one artist may not work for another. Understanding how light variations reflect off surfaces, will improve an individuals work flow. In time they will discover what work's best for them. Here's a thread I began asking about indoor lighting, which provides some tips on indoor lighting.
http://www.daz3d.com/forums/discussion/65079/any-tips-on-indoor-lighting#latest
I think the point that lighting is really an art form in itself has been madde fairly well, so here are a couple of practical suggestions:
First and foremost, lighting can be as much about the shadows in your scene as it is about the areas that are brightly lit. One of the ways to affect the look of shadows, and your scene, is by adjusting the size, geometry and/or distance your light source is from objects. Spotlights are the workhorse of lighting scenes. You already know how to alter their distance by moving them around in the scene. However, what you might not have noticed is that you can change the geometry and size of them as well.
By default, spotlights are set to use a point geometry, and they're relatively small (10cm). In the settings for the spotlight, there is a dropdown where you can change the shape to disc, sphere, rectangle, etc. By simply changing it from point to either disc or rectangle, you'll make a small difference in how your shadows appear. To really make a difference, try experimenting with the size as well.
For example, photographers shooting portraits often rely on 3 foot x 3 foot (and larger) "softboxes" which use diffusers and/or reflecters to make the light coming from a lightbulb spread out. This helps create soft shadows where the edges of the shadow is blurry. If they just shined a lightbulb directly on their subject, they would get really hard shadows where the edges are well defined (think of the typical police interrogation room scene from any movie, or the shadows cast by the sun at 1pm on a clear day). By increasing the height and width of your spotlight to between 90cm and 100cm, you get the same effect as using a 3' softbox.
The rule of thumb is the larger your light source (in physical size), or the further your light source is from your subject, the softer the edges of your shadows will be. Also, the spread angle of the spotlight can affect this as well. Note also that light bouncing off of other objects in your scene can also affect the look of some shadows.
The other key thing is to learn about the tone mapping settings in the render settings. The f/stop, shutter speed, and ISO all work pretty much the same as on a real digital camera. They determine how much light from your scene makes it into the final render. If you aren't familiar with how these work on a camera, just google it. THere are an abundance of sources out there that explain them.
"Light Science & Magic: An Introduction to Photographic Lighting" is probably the best book I've ever read on the subject of lighting, but it's a little expensive. The ebook version is cheaper though. Although it's geared toward real-world lighting for photography, much of it is directly usable in DS as well.
https://www.amazon.com/dp/0415719402/ref=cm_sw_r_cp_awd_OhMvwbD04F29E
Awesome info! Thanks everyone. The real motivation behind my question was to try and cut as much trial and error as possible due to my slow render speed. Light experimentation will literally take me weeks due to the amount of time it takes for the picture to load and for me to see what is off. I know that I need to upgrade my processor and RAM. As soon as I do I'll be in the lighting trenches because it really is the key to a great render. I have been playing with one tonight and am blown away at the difference in picture quality so I have definitely been bitten with the lighting bug. Thank you all for your words of encouragment and information.
I can only suggest that the fewer lights in a scene the better, particularly if you are using Iray, that's the beauty of PBR.
If, as you say, you mostly render indoor scenes, then there is nearly always only one light source in a normal room.
And although some people tut tut using light emitting surfaces to light Iray scenes, I like to use them, but it does blow out your render times a bit.
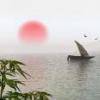
Here's a scene with no lights at all, just light emitters.
Do your self a favor and get your self a copy of this book.
http://www.amazon.com/Digital-Lighting-Rendering-Voices-Matter/dp/0321928989/ref=sr_1_1?ie=UTF8&qid=1448522399&sr=8-1&keywords=digital+lighting+and+rendering
3rd edition is the most current but any edition will do. If you have access to a used book store like half price books take a look there and you might find a cheaper used copy. It an easy read and will teach you much of what you want to know. The 1st couple of chapters are a must read primer that will really give you a good grounding in lighting technics.