How to render without noise in low light room?
 James
Posts: 1,098
I want the result to be underexpose.
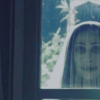
Dark with little light exposing the figure.
But the result is noisy even with post denoiser on.
although I increase max. samples to above 10000, it finished before 10000.
How to handle this kind of situation?
Post edited by James on


Comments
If the render is stopping before it hits the max samples then one of the other two triggers is being hit first - Increase the max time and the convergence percentage also.
NOTE: if your render has "completed" and you are not happy with the result then before you save it you can pop open the drawer to the left of the window (there is a teeny-tiny handle you can click on). This will open up the render settings for that image where you can adjust the settings and then "continue" with the render from where it left of and now using the settings you have adjusted.
In general terms you will struggle to reduce noise in dark areas with iray. There are some tricks you can try to see if they improve things - I am not the best person to advise specifically but I do have this post bookmarked as a good starting point: Shooting Day for Night. The linked images are broken but the text is still good. I have used it a few times for a few renders so perhaps it might help you?
With interior scenes one should realize that the default rendering/tone mapping settings are for bright outdoor scenes, ie. one should set the cm2 factor to 10 and ISO to 400, these will make setting the luminance values much easier as they are closer to real world values.
Then one should look at where the light is coming from, outdoor sources (sun/sky/HDRI) are bad at lighting enclosed interior scenes and that will cause noise and increase rendering time.
If one wants the rendering go on for longer, one can set the "Rendering Quality Enable" to Off, then only the number of "Max Samples" (iterations) and "Max Time" will be stopping the rendering, unless one stops it manually.
what effect does cm2 factor brings?
With cm2 factor of 1, one needs to increase the luminance values 100 or 1000 times brighter, ie. if one wants a "100 watt" lightbulb in a scene, one needs to set it to 10000 or 100000 watts (have forgotten which) to get even close to how a 100 watt lightbulb would light up the scene in real life. Setting the cm2 factor to 10, lets one to set the luminance value to 100 watts and the amount of light in the scene isn't that far from how a 100 watt lightbuld would give in real life.
The default cm2 factor of 1 is better suited for outdoor scenes with California sunlight at high noon.
You have to also slide the render time all the way to the right and turn render quality enable button to off.
Turning this button to off does not reduce image quality, it just lets the render process continue on without stopping at a set point.
The trick I heard off is to NOT render in low light. Make the scene bright enough to avoid noise, keep the canvas activated and darken the scene in post production.
Alternatively to doing it in post, you can change the tone mapping in DS before render.
Thanks for this tip. I have not been using the cm2 factor at all (I hadn't got that far down the tonemapping parameter list). What I do most of the time is adjust the Exposure Value and I did notice that changing the cm2 setting also bumps up the EV so perhaps I was doing it without realising although I have never gone as high as your recommendations so I am keen to try those settings.
Why playing with cm2 and exposure seems to be the same thing?