Rigging and Weight Map Troubleshooting
 Cyrinadia
Posts: 143
Cyrinadia
Posts: 143
Hello All,
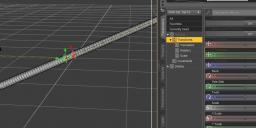
I've managed to kind of figure out how to get the bones to 'stick' to an object, so a little progress has been made. But now I have run into a new problem (for me), in that when I bend a bone in the middle of the item, it does what the (hopefully) attached image shows. I want it to bend like a tail should, not see-saw for some currently unknown (to me) reason. I just don't know how to ask the right questions either. I did the following things iirc:
- Basically, I used figure setup tool to add extra ghost bones so that the tail will (to my thinking) follow G9 scales, shapes and whatnot, including l-thightwist1 and such.
- I created the figure without G9 in the scene initially, and the hip was initially located in the centre of the object.
- I set weight maps to fill at 100% on selected polygons following SickleYield's message in https://www.daz3d.com/forums/discussion/53538/way-for-smoothing-weight-map-about-many-bones-snake-at-once-solved .
- I memorised figure rigging.
- After some tests I thought maybe the hip location was the issue, so I used Transfer Rigging Figure Space (initially backwards), then memorised again.
- Then this happened
So, I want to know: Why is this happening like it has? What is going on? What could have caused this? What did I do wrong? How do I fix this?
And if it's weightmapping issues: what is the general standard for a 'tube' shape, regarding 'Smoothing' and 'Iterations' in weight mapping? If Gradient Fill is the best way, how could you sort out the 'Gradient Fill' spheres to make nice bends instead of having, say on the X Rotation, what is displayed in extreme in my image?
I will most likely run into more hiccups along the way, so hopefully I can puzzle this out over time. So, hold please for more questions!
Daz 3D is part of 
Connect
DAZ Productions, Inc.
224 S 200 W, Suite #250
Salt Lake City, UT 84101
Licensing Agreement | Terms of Service | Privacy Policy | EULA
© 2024 Daz Productions Inc. All Rights Reserved.
Comments
What does the weight mspping for the bones look like?
What is the hierarchy, too - it's named Tail 10 so i assume there are other bones between it and the hip, but how then do they bend and how are they parented?
Only the first joint bends as expected, Tail 02 (I set tail 01 as a buffer). The list is as shown, I have the Hip[hip] then Pelvis[pelvis] then all the bones as shown. I found the internal names for the thighs etc in their settings in Parameters. I think this part I have correct. But. If it isn't, I would definitely love to know.
I'll admit I have a lot of issues with Weight Mapping. I'd love a Weight Mapping For Idiots guide to it.. I'm attempting to get them to display for me.
That said, there appears to be nothing for each individual bone and axis, however when I select Show Children Weight, it all goes solid red, which may be why I'm getting the See Saw style bending. So the next question is, how do I fix that? What caused that?
At one point I was about to do individual bones with the Fill By Gradient, though I ran into a bulging issue (if I bent up, the underside would bulge down) even though I have no bulge maps. I'm not sure if it IS an issue, or will become a part of the smooth curve of the overall shape once all the bones were done. I might see about redoing that method, now I have some free time.
I would suggest that you convert to 'General weights' as that is the norm now, and then you only have one weight per bone.
But each bone should have weight around where it is placed. It sounds to me as you haven't done any weightmapping.
Your pictures made me think of a tutorial from Sickleyield where she mades a similar tail, but in that she also shows how to apply weight mapping. Have you used that as refernece, and if not I would suggest to see it.
Hello Felis. I ended up following that tutorial you mentioned that's by Sickleyield. It works up until the Geograft stage. When I follow the step for Transfer Utility, all the Face Group polys end up on Pelvis. Which is the step I ran into last time I tried to do this same project. I'll show what I'm doing. The first pic is the pre-TU poly count with Geometry Editor. The second is the options as per the tutorial (though there's now extra checkboxes since the tute was made). And then the last part, the part that makes me Reeeee. Just, why?
Last time I thought I could fix it by carefully reselecting every poly and putting it back. It failed.
Although I do note I may need to add another ghost bone for Spine.
It is quite some time I have seen the video, and I can't remember the steps.
But if all faces end up on the pelvis, it can be fixed, it just requires some steps.
A) Go into geometry editor and select the faces belonging to the first bone.
B) Select first bone. Go into Weight edit tool: select General weights in Tool Settings and fill selected with 100%
Repeat for all bones.
When all faces are distributed select whole tail and smooth weights.
I have seen the video now..
Did you generally follow the steps? I.e. you had your weights in place before using transfer utility?
Yep, had weight maps in place with Smoothing 9% and 8 Iterations. Tested them for nice bend shape and for 'sticking' to the mesh. They did it all properly (thanks to everyone's help, a lot of progress from the start of this post, thanks all!).
Then I did the Transfer Rigging Figure Space to 'Graft' the tail on. Same Face Group issue. I tried a few times with various check boxes unchecked. I even attempted to try and see if it was that Dstudio thought the tail bones were unused, so I unchecked "Remove Unused Bones" during TU in case that was the issue. It wasn't.
I'll test Transfer Utility without hiding the bones... it didn't work. I do note that TU made its own surface groups. I think I'll use those surface groups and will try redoing the bones again :)
Ok, so I did all that and all the bones for the tail are gone. It did give me a complete G9 Ghost skeleton though. So, where did my bones all go? And why? I'm pretty certain I Memorised Figure Rigging too. But will retry that too.
I found out eventually what was wrong but I don't know if I can mention it because it's from a paid tutorial. Let's just say Transfer Utility, and leave it there.
I assume that paid tutorial didn't require you to sign some kind of NDA! Knowledge you have acquired from whatever source can be freely shared.
Some years ago I bought tutorials for Unreal's Sequencer, which is an editing suite for cinematics (cut scenes). I'll happily share that info with anyone who asks a specific question but I won't share the video I learned it from. Buying a tutorial is no different to paying a private tutor. That information is not copyrighted - just the medium it came from.
If you want to tell people how to overcome the problem you can. You just can't post the video you learned it from.
Ok, that's good to know. Basically, use Transfer Utility before rigging anything. No point in setting everything up only to have Transfer Utility bork it up. So, run that THEN begin rigging.