Tutorial: How to Fix Oneiros
 mding
Posts: 1,278
mding
Posts: 1,278
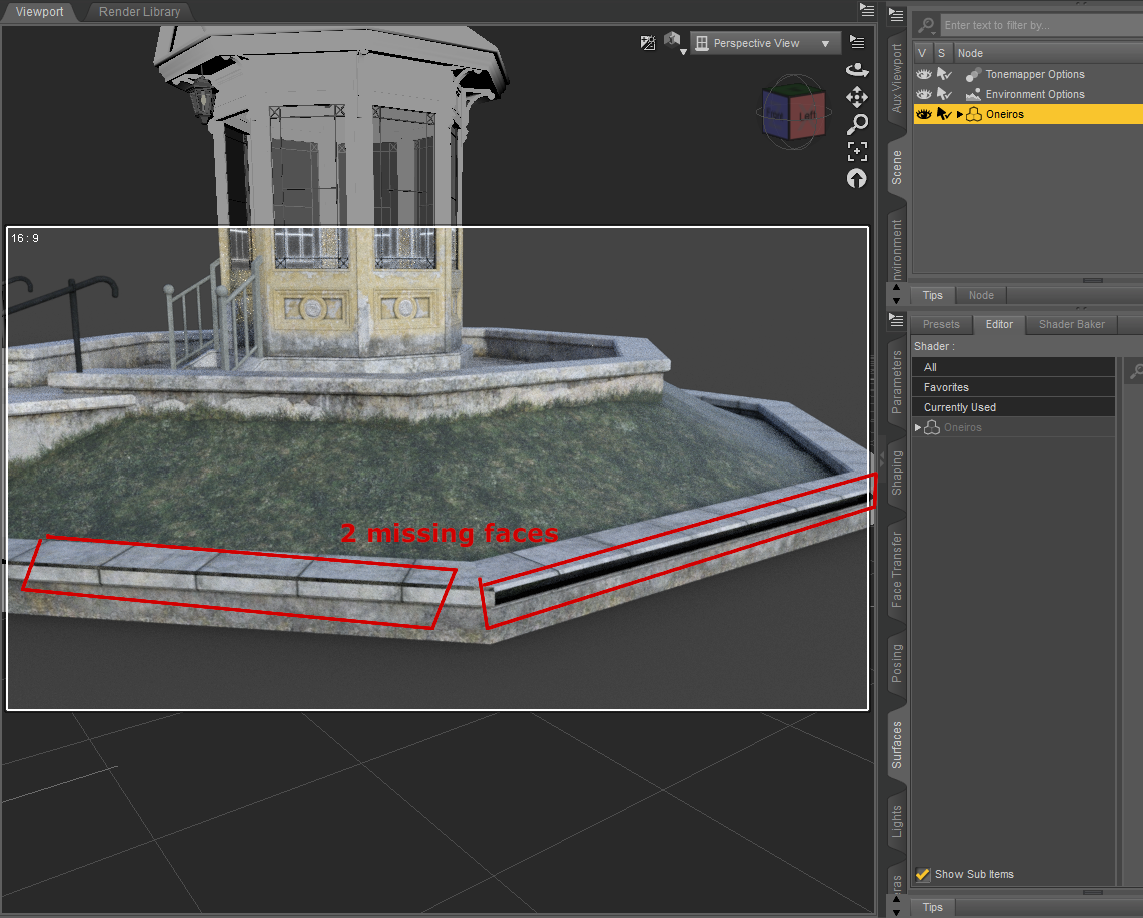
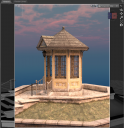
Oneiros is a beautiful and versatile product but for whatever reason geometry has been lost at 2 places.
If you can’t wait until it gets fixed by DAZ and lack the knowledge to do it yourself, here is a step by step solution for those who may need it:
You need Hexagon installed on your computer which is free in DAZ, but you don’t need any further knowledge.
In DAZ Studio:
1. Load the Prop Oneiros in DAZ.
2. Click on Oneiros in the Scene Tab to select it (yellow)
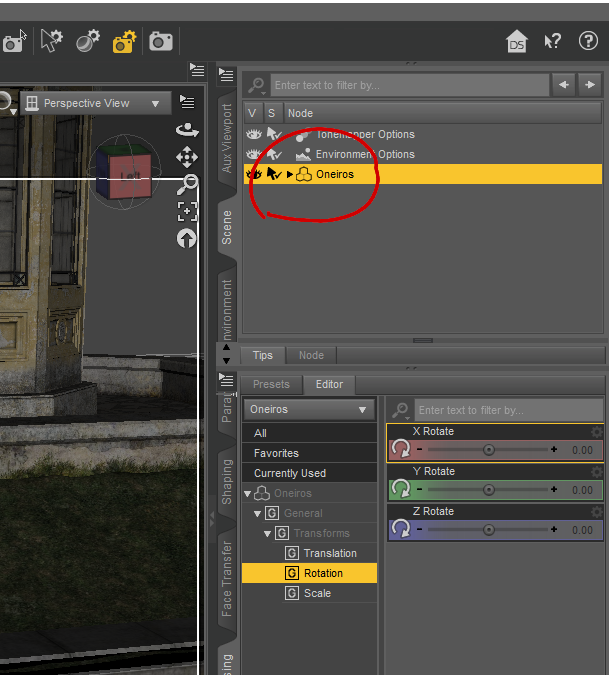
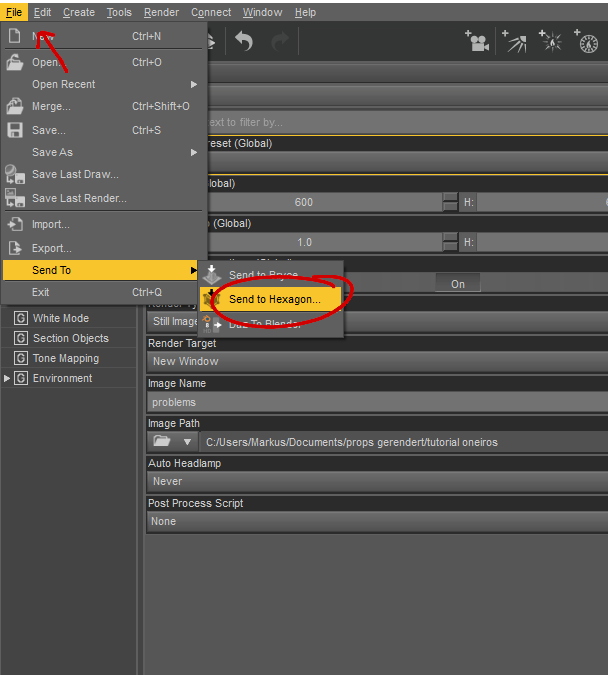
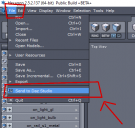
3. Click „Send to Hexagon“
In Hexagon:
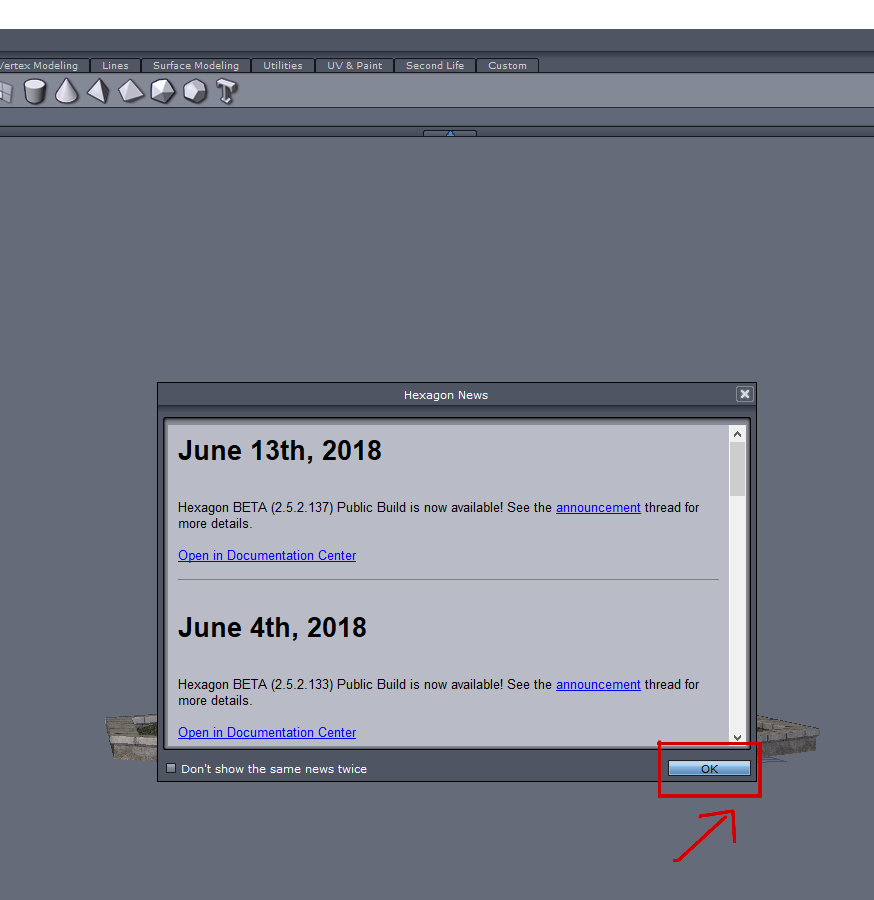
4. Click „ok“ on the Hexagon News Window
5. Click on „Oneiros“ in the Scene Tab (it turns blue)

6. Click on „on_base_bot_s2“, that is the second entry in the Shading Domains Tab (it also turns blue).
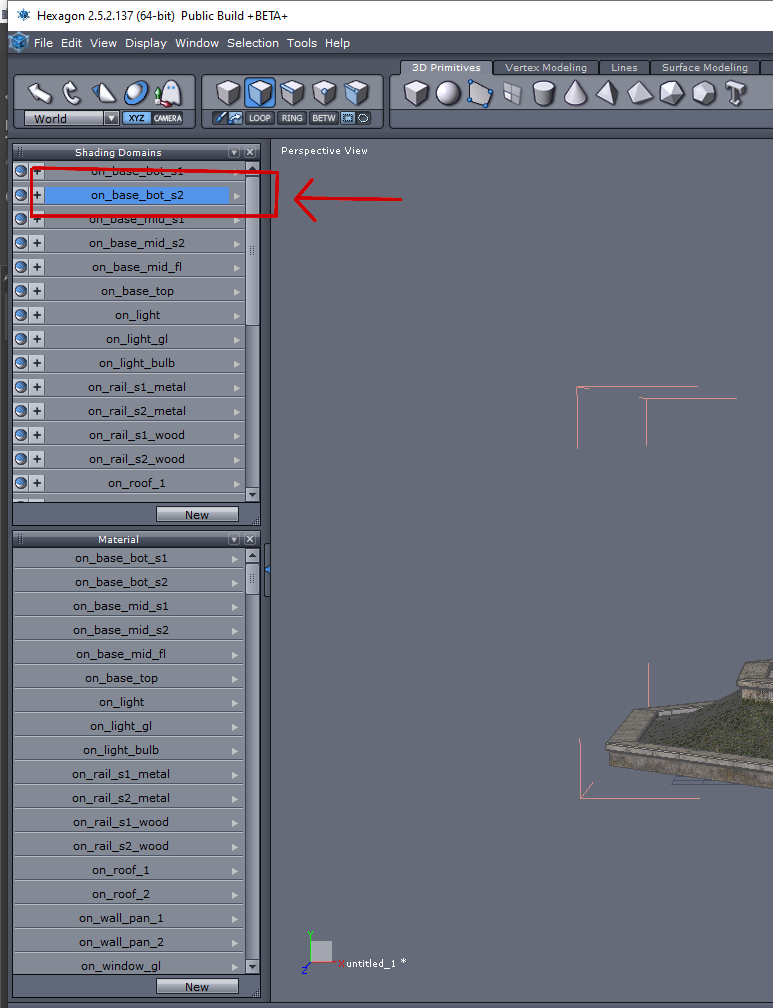
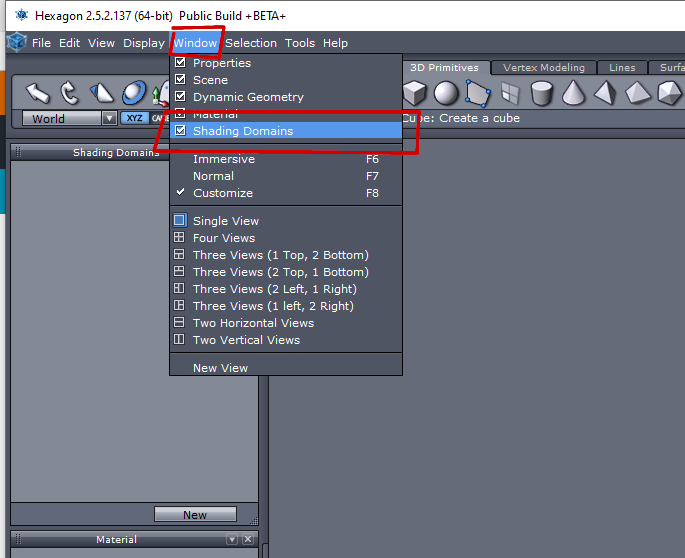
If you can't find the shading domains tab you can activate it in the WINDOWS menu:
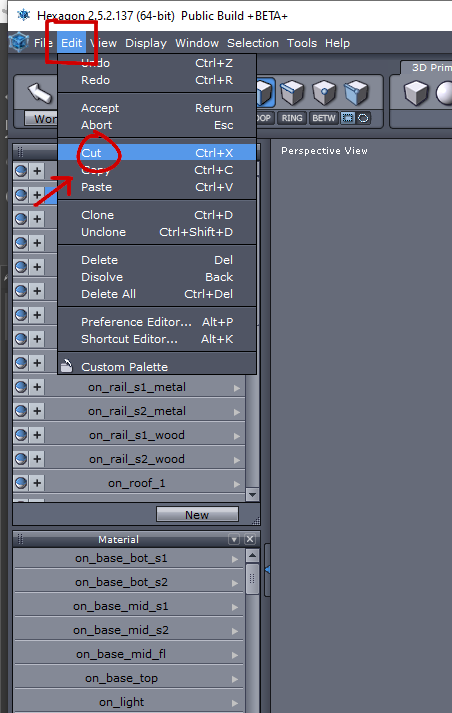
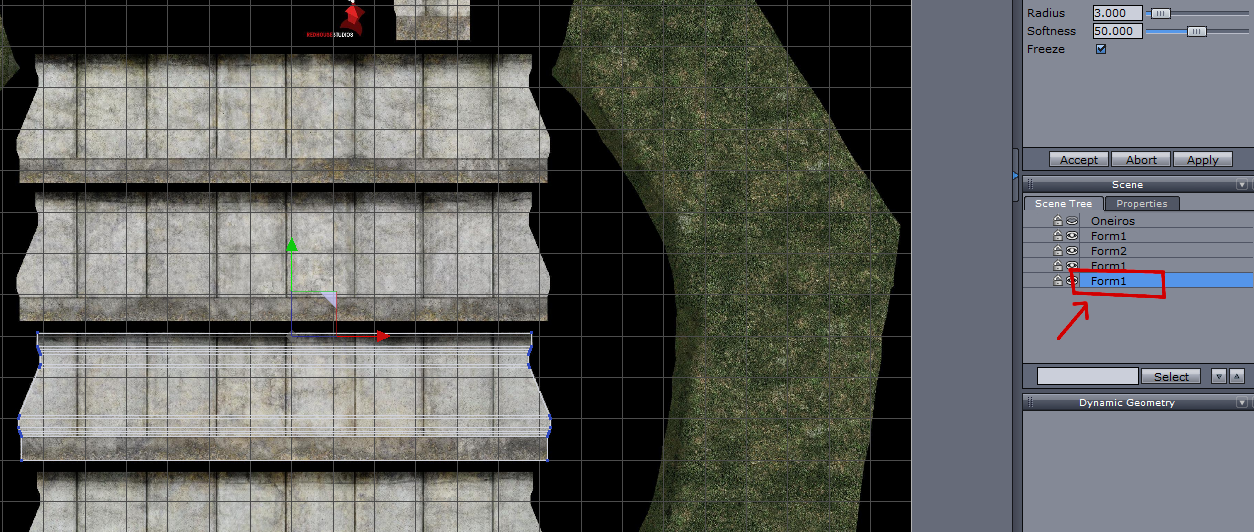
7. Now Click „Cut“ (ctrl+x) and after that „Paste“ (ctrl+v) in the EDIT Menu.
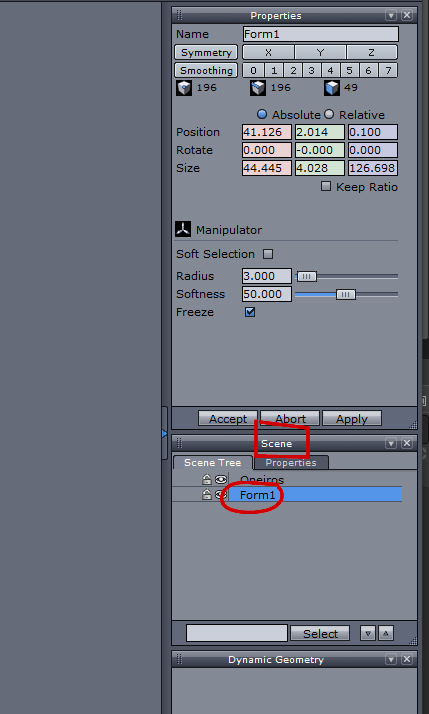
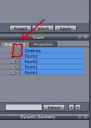
In the Scene Tab appears now the second entry „Form1“ and it has turned blue (which means „selected“)
8. Now in the „scene tab“, to the left of the first entry „oneiros“ click on the eye symbol
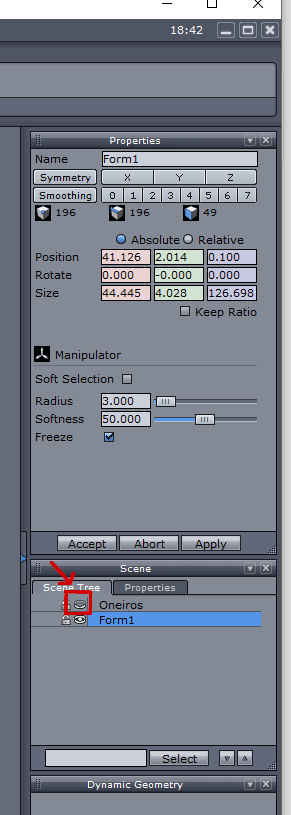
the main part of the prop is now invisible:
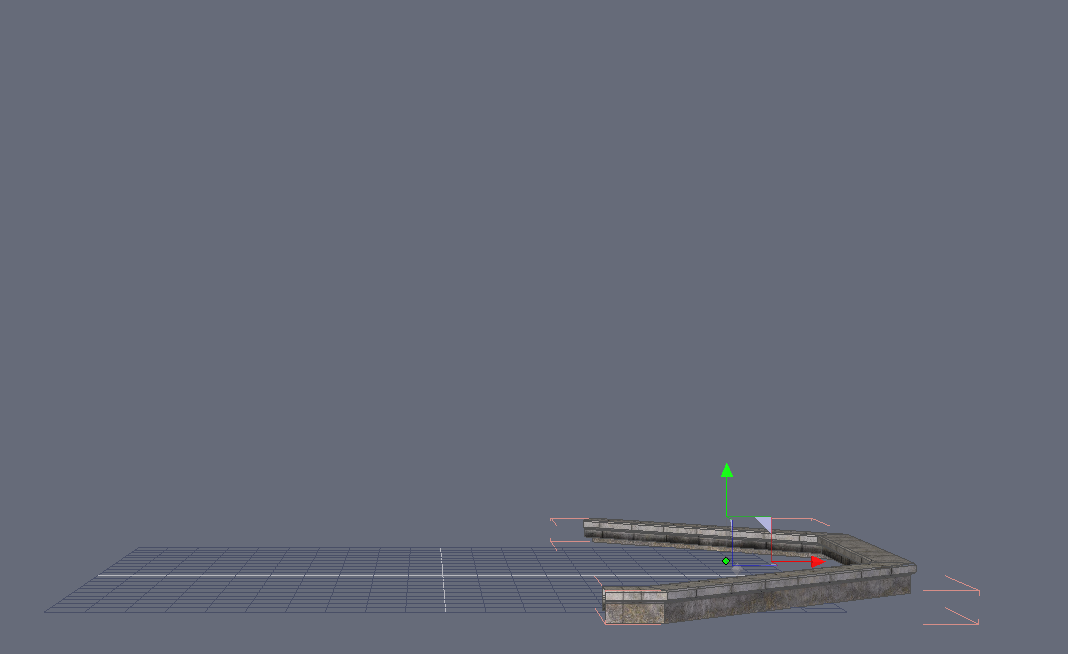
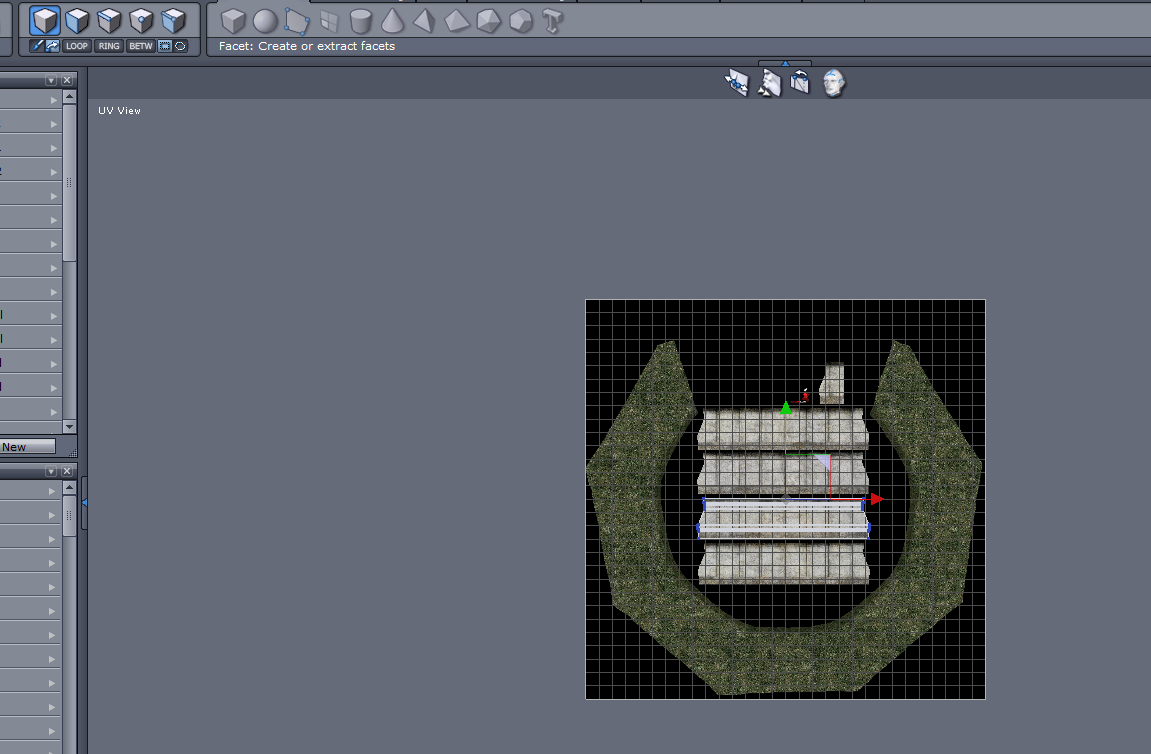
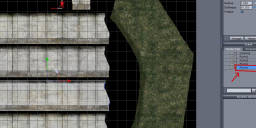
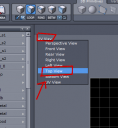
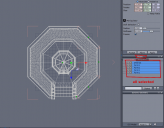
9. In the Viewport click on „Perspective View“ and then choose „Top View“
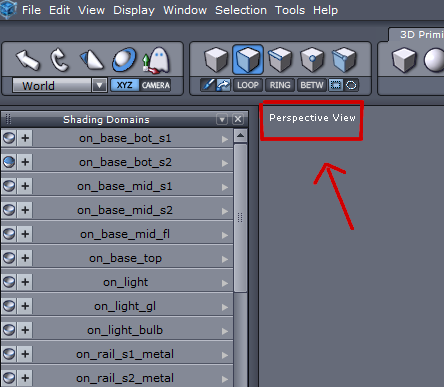
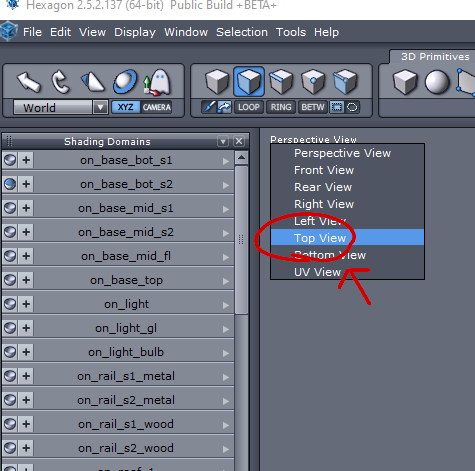
You see the Prop now from above:
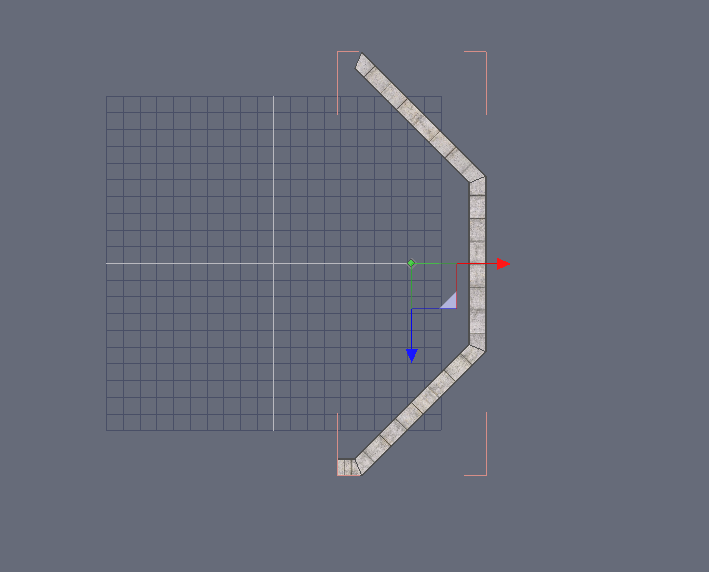
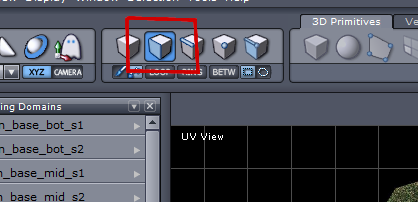
10.In the Viewport Utility Bar click on „Wireframe“

The prop looks like this now:

11. Press F2 (OR click on „Select Faces“ in the "Selection Type Bar")
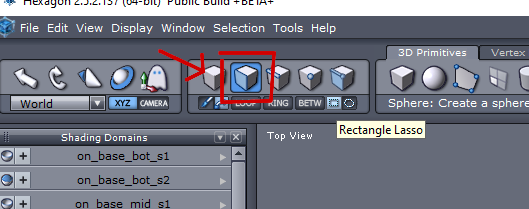
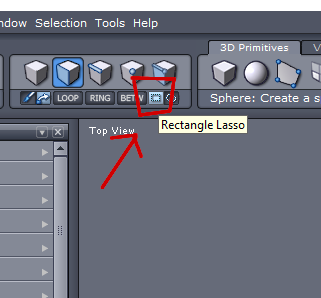
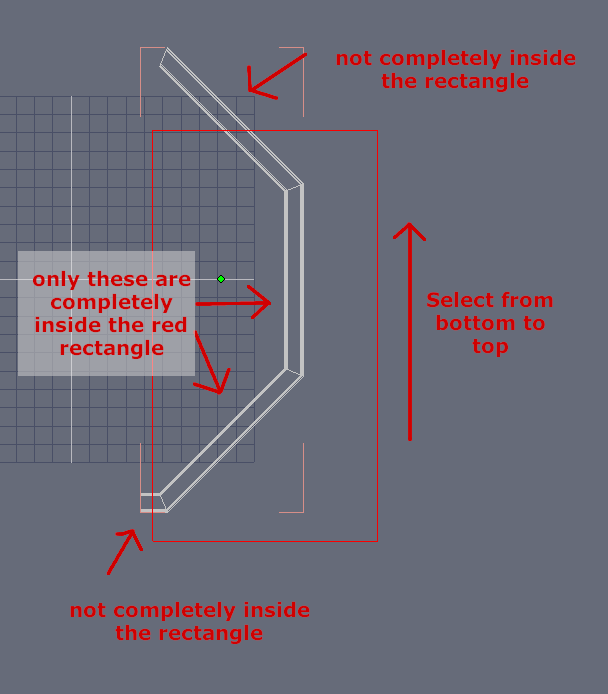
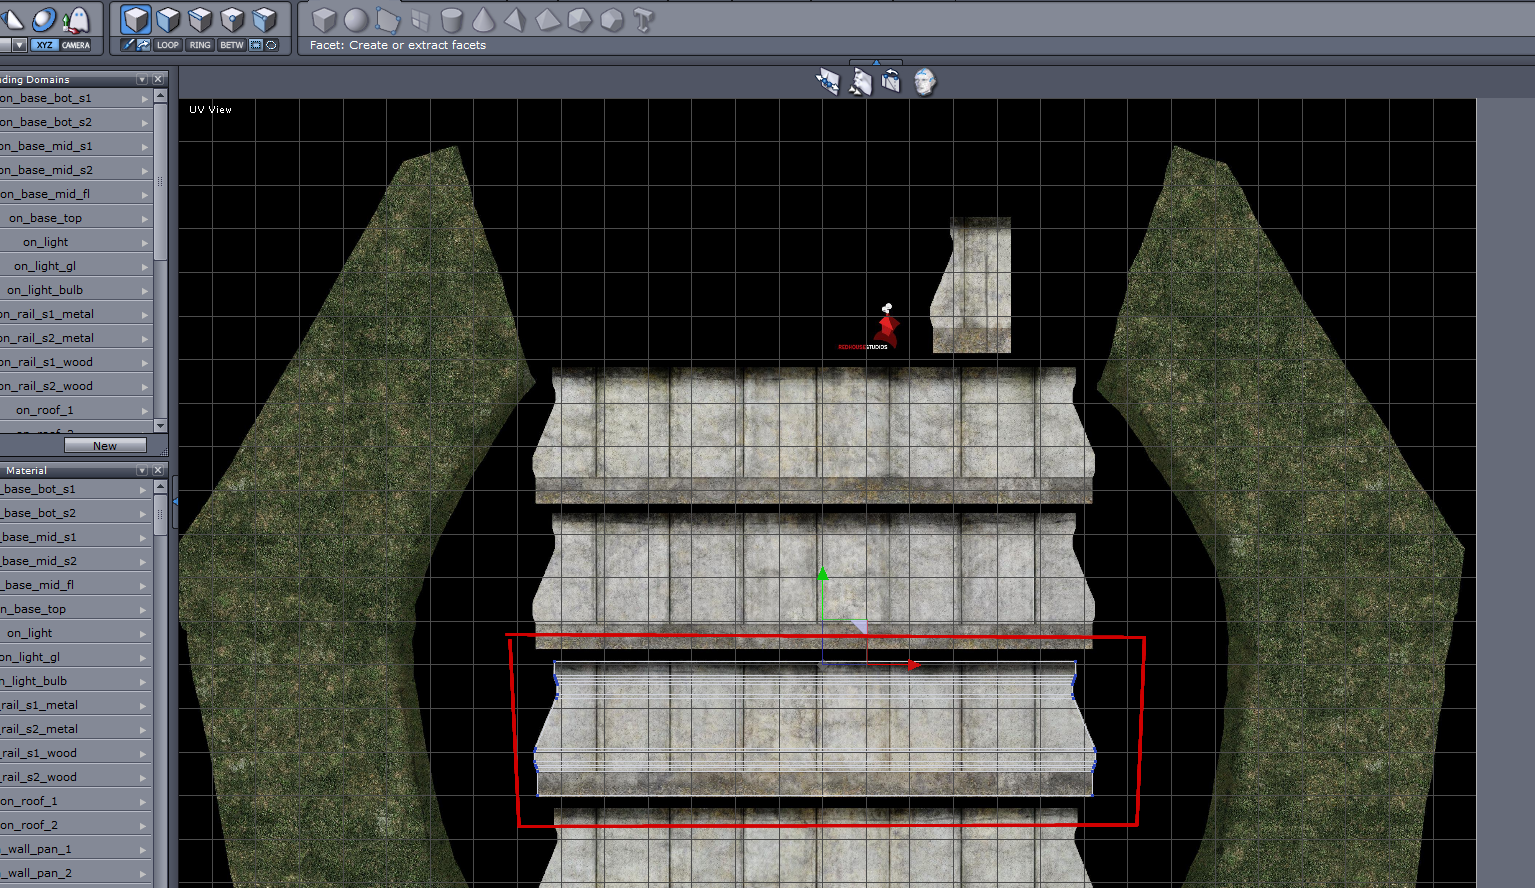
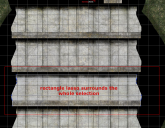
12. Click on „Rectangle Lasso“: This Lasso selects only the parts which are completely inside of its‘ borders.
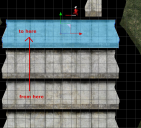
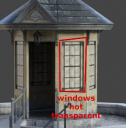
13. The Prop consists of 4 parts, a tiny one and 3 long ones:
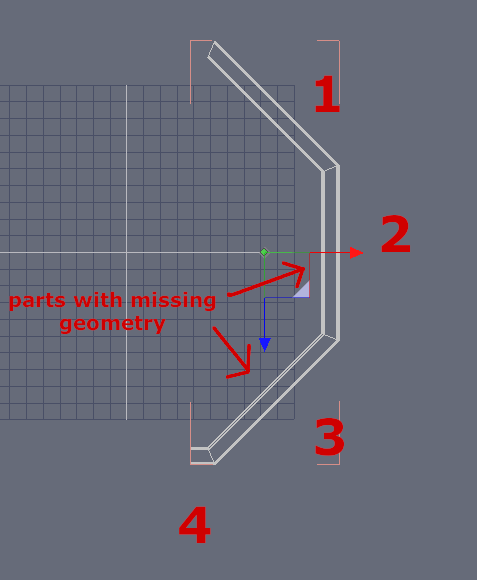
With the scroll wheel of your mouse you can zoom in and out.
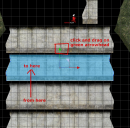
With the right mouse button you start the selection.
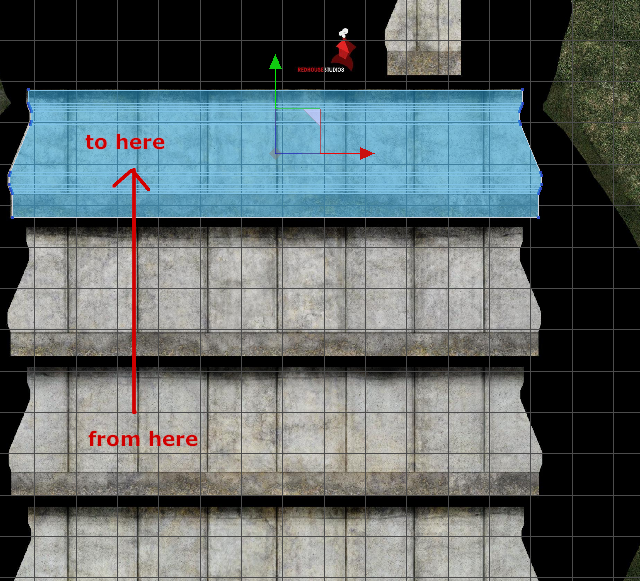
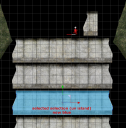
You have to select the first two long parts with the missing geometry ("3" and "2" in the screenshot above) by placing the rectangle around them and avoiding to place the other two parts completely inside that rectangle. Start from the bottom like so:
14. Now both broken parts are selected.
15. Hit Delete (NOT Backspace) .The selected parts have been deleted
16. In the same way select the tiny part, choose cut and then paste in the Edit Menu.
17. EDIT: forgot to delete this step before posting, so please ignore.
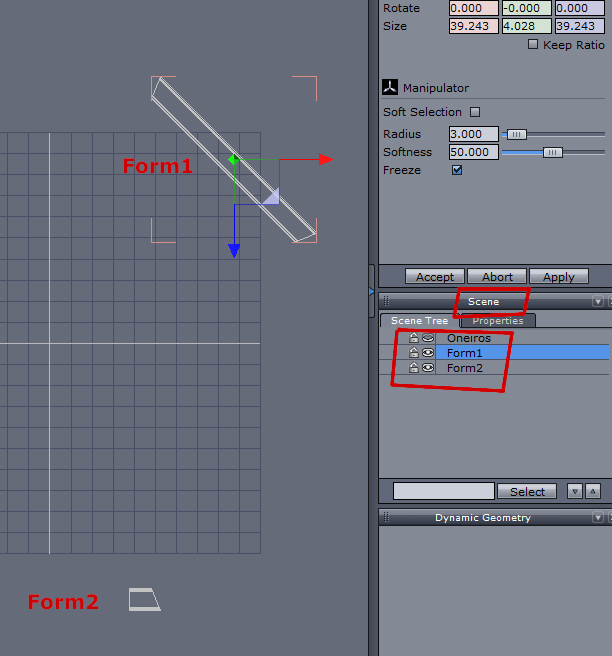
18. In the Scene Tab you can see now
„oneiros“ = invisible rest of the prop,
„Form1“ = larger part and
„Form2“= tiny part
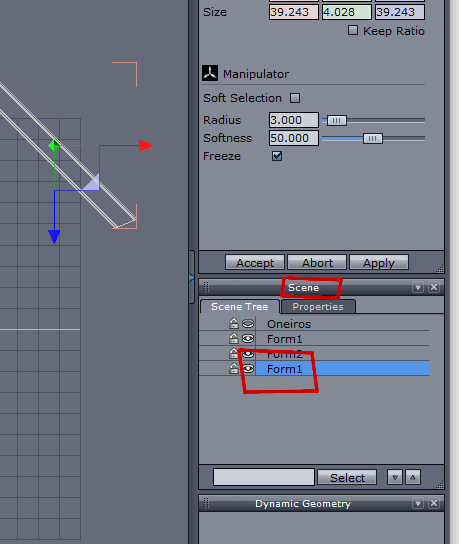
19. With „Form1“ selected, type ctrl+c (copy) and ctrl+v (paste). A new „Form1“ has been created and selected.
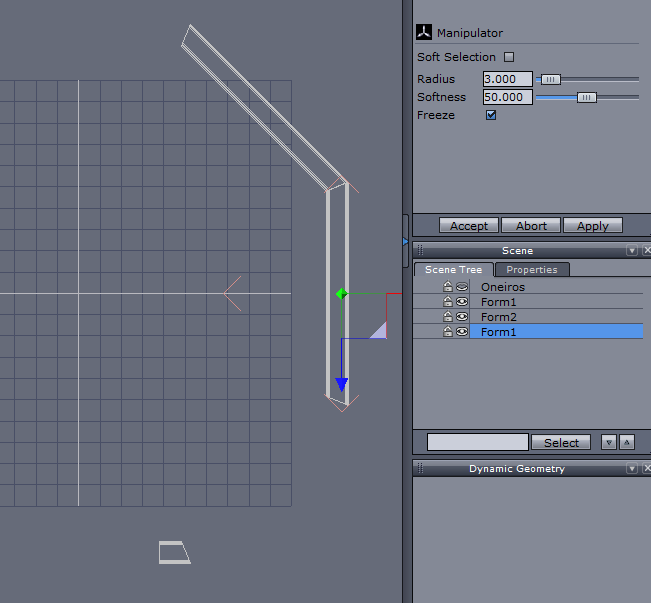
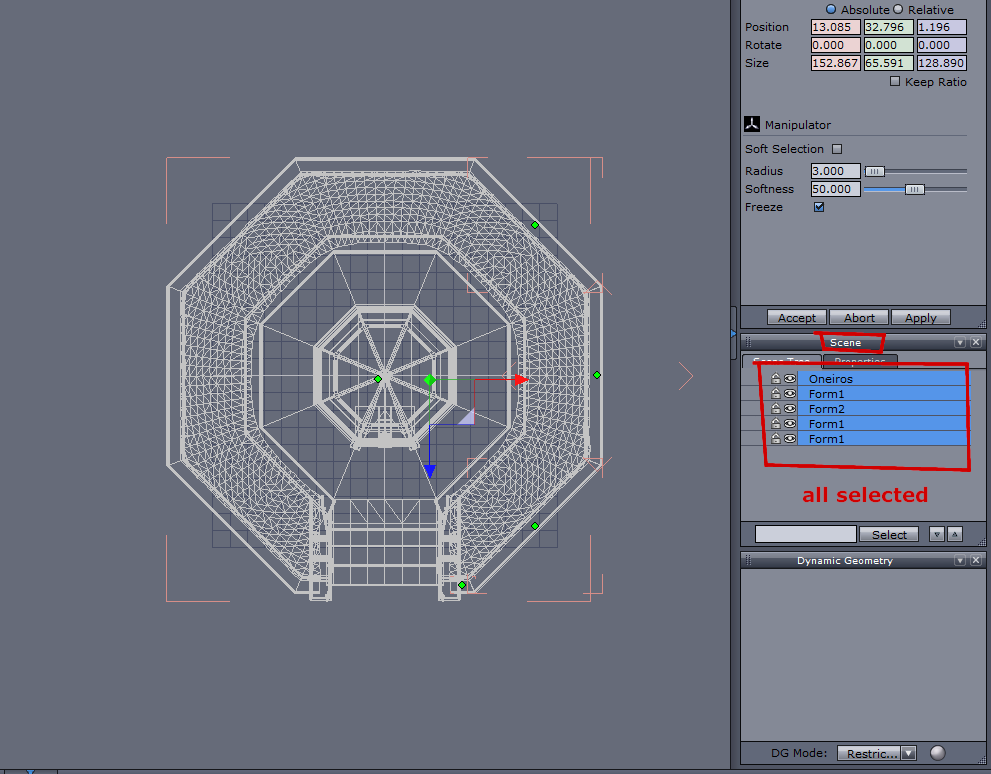
20. Inside the „Properties“ Tab, in the green column, in the „rotate“ row enter „–45“.
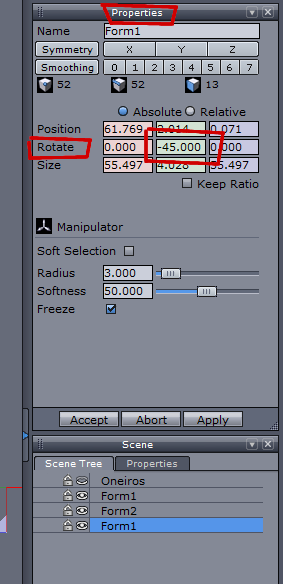
Your scene looks now like so:
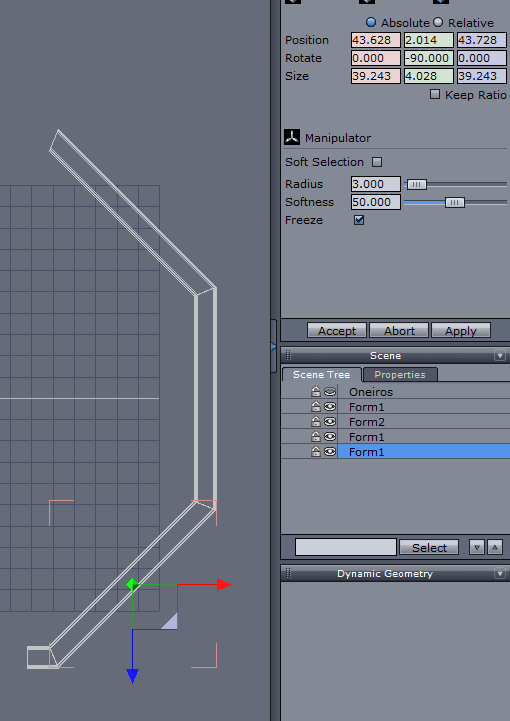
21. With the new „Form1“ still selected copy and paste again (like in step 19) and enter into the same place like in step 20 the value „-90“. Your scene looks now like so:
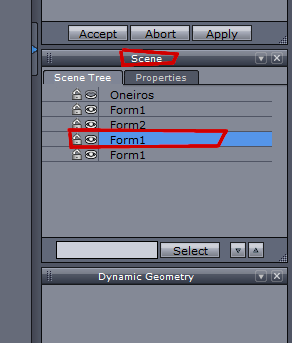
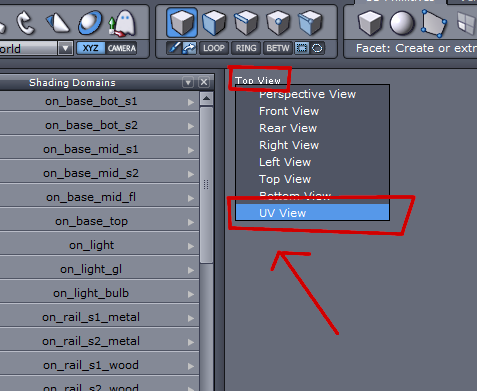
22. Select the second "Form1"…
23. ...and change from "Top View" to "UV View":
24. With the scroll wheel of you mouse zoom in a bit to better recognize the selected area („uv island“)
25. Hit F2 to choose Face Selection…
26. …and with right click (holding) select the selection (uv island) completely


27. Hold ctrl, then left - click (hold) on the green arrowhead and with the mouse move the selected area onto the texture part right above the previous one

28. Click on the last „Form1“ in the Scene Tab
29. Select the „uv island“ as in step 26 and move it this time to the texture above the one chosen in step 27
30. Choose again the „Top View“

31. Click on the eye symbol of oneiros

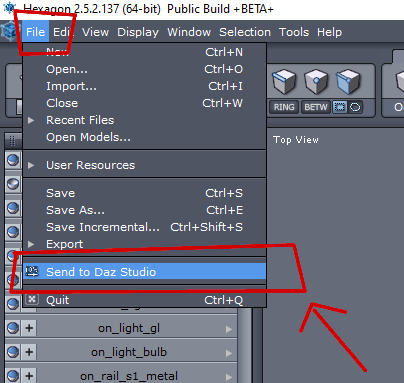
32. Select all nodes in the scene tab
33. Click „Send to DAZ Studio“
Back in DAZ Studio:
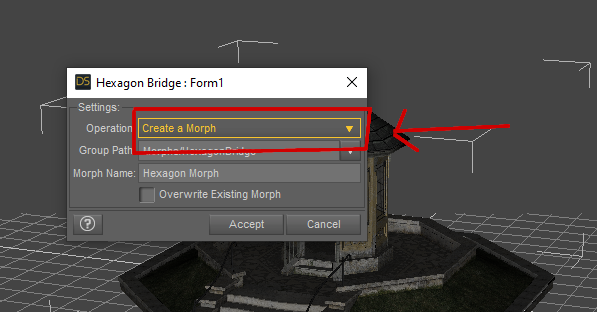
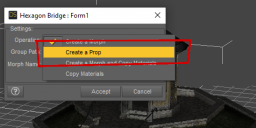
34. Click on „Create a morph“ and choose „Create a prop“ in the forthcoming menu and hit „Accept“
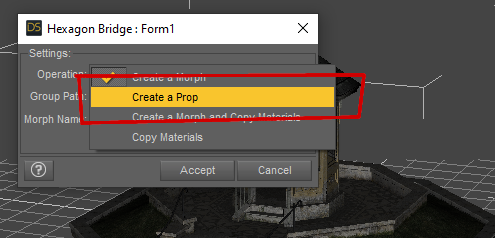
35. Repeat with the next dialogboxes until all parts have been processed
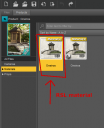
36. Delete the original oneiros prop in the scene tab
37. Select „oneiros (2)“ in the scene tab and load the RSL material onto it. This is necessary, as the IRAY material is broken concerning the windows.


38. Oneiros now ready to be further adapted to your scene.


Daz 3D is part of 
Connect
DAZ Productions, Inc.
7533 S Center View Ct #4664
West Jordan, UT 84084
Licensing Agreement | Terms of Service | Privacy Policy | EULA
© 2025 Daz Productions Inc. All Rights Reserved.
Comments
My method to fix Oneiros:
Export to Blender
Create the missing faces
Tweak the UV until the joints match
Export to Daz
Copy the surfaces from the original Oneiros to the fixed one
Use the Transfer Utility to retrieve the bones
Done!
Unfortunately, i am too much of a beginner to do that. What you just wrote may be easier, but i couldn't even try to follow your steps, because i lack the knowledge. That is why i created that tutorial, so others, who are in a similar situation can get access also to oneiros.
I thought I would be clever and show you a DAZ studio only way but it was not easy as nothing is lined up xyz
with geometry editor selected select the matching faces the other side
invert selection and hide
scale it -100 on X axis
edit flip normals
export that as obj no hidden checked
import it and uhmmmmm line it up, this is the messy impossible bit
yeah, i also at first in my frustration thought of creating separate faces in daz and closing those stupid holes, using a new texture for that entire wall, lol. It never looked good...
It is really a beautiful model and those steps should take less than 10 minutes (i do it in 5). The tutorial is just a bit bloated, because it is done for people who never even touched Hexagon. Whoever knows how to model doesn't need a tutorial, right?
Sure your tutorial will be useful for the ones that use Hexagon! Thank you!
I'm too lazy to make a complete tutorial about the method I used, and I'm not really a Blender teacher :)
@rosseliani: I totally understand, i wouldn't have done a tutorial, if i wasn't a fan of that prop, lol. And some day in a far future i may be able to understand what you explained. It is true that in the longer run we all will have to learn blender.
yeah Carrara it's a 2 minute fix in the vertex modelling room too
@WendyLuvsCatz: that would be a new reason to buy carrara: the fastest way to fix your broken DAZ products