Daz 3D is part of 
Connect
DAZ Productions, Inc.
7533 S Center View Ct #4664
West Jordan, UT 84084
Licensing Agreement | Terms of Service | Privacy Policy | EULA
© 2025 Daz Productions Inc. All Rights Reserved.
Comments
It doesn't even have a closure. It is one of those magic garments. It is just a simple thin MD garment. The pleats gave me enough headaches on their own, without adding any extra details.
I needed to take a break from the coding on my Marvelous Designer - JCMs and character shapes project- though I'm making progress. Really. There's a lot of steps to automate, to say the least!
Not to be a total slacker, here's a few techniques I've been tinkering with. I did some research on medieval and renaissance shirts - basically square swatches of fabrics with a few cuts and gussets to create shape instead of modern flat patterns with curves.
One element of realistic cloth I keep coming back to is well created opacity maps in addition to transparency to give the cloth weight when folded over and to let the underlying skin add to the rendering mix. (I should redo this render, alas - the fastners didn't export for some reason and I didn't catch it - grrr.... always something! And I called out others for not having fastners to boot!)
Also, I imported Michael 9 as a garment instead of an avatar to create the tights. I think that constitutes a 'derivative work' for sure - so for personal projects it's a cool technique to create tights, skin-tight clothing, etc. Be sure to trace UV as a pattern (great technique for breathing new life into old clothing as well.) I added some internal lines (draw on 3D pattern tool) and piping in Marvelous Designer to give the tights some interest, then in DAZ added some metallic flakes in the material for some sheen.
Fun stuff. Very different from my sloper techniques for sure.
Images in my Gallery.
Keep up the good work. I didnt realise those medieval garments were so simplistic.
There's also always cloth subsurface properties if you wanted to be extra: https://www.daz3d.com/subsurface-workshop-sss-shaders-for-iray ;
although probably wont make much difference without backlight.
Following on from previous discussions about maintaing the overall 'shape' of a garment while simulating the garment for FBM/JCM: I recently was experimenting with simulating some .obj garments, and noted that if i used the rigid leather cloth property when simulating, it maintained the obj's folds pretty well. (So it was similar to using solidify on a normal MD garment). I'm not sure if that approach would work for all garments, or whether it was just fluke with the garments i was animating with yesterday.
I hope you find the time and inspiration to continue the JCM project. I am intrigued by the statement about "attach to measure and freeze". I don't know what that means in regard to Marvelous Designer.
I noticed that some corners of your renaissance shirt, that appear sharp in the pattern, look rounded in the render (e.g. the cuff edges). That happens to me when I apply subD to the MD garment in Daz Studio. My workaround in MD is to add internal offset lines with a small offset near the edges and corners that I want ot keep sharp.
If not finishing with a retopology, I have braced edges and corners in similar way by using a separate cloth panel to split near the hem or edge, then do not merge into a single panel. It assures that the geometry will have an edge at the panel edge. Note - I had an older version of MD so may be quite outdated. --- I upgraded at end of 2022 but have not had a chance to explore newer features yet.
I think that is essentially the same thing. The internal lines that I use, also force a line there in the topology. I'm not doing retopology either.
Yes, I think it has a similar effect. I think the internal line method you describe may be superior for having a single UV panel.
Pleats and Ruffs
New video out on creating pleats and ruffs.
In this video I talk about creating realistic pleats that will also simulate well. There is an excellent pleats tool in Marvelous Design, and it can get you started. For myself I like total control over the folding and shaping of the pleat so I create them manually. In this video we'll look at using layers, collision thickness and sewing fold angles to get complete control over your pleats and ruffs.
I always appreciate the likes and comments on how to make my work better in the gallery: My DAZ Gallery.
Great to see you back with another good video tutorial and bonus skirt sloper!
Vanity of Vanities
One of my most ambitious Marvelous Designer projects to date. An English court costume c. 1510, another from 'Tudor Costume and Fashion' by Herbert Norris.The sleeve textile pattern was created in Adobe Illustrator and PBR maps generated from Substance Painter.
The Skirt was created using the pleating techniques discussed in previous posts only rounded not sharp- It was needed here to create the proper shape. Most likely the skirt would have been cut in rectangular units, but when I did that I could't get the shape I wanted. Then I added pressure and solidify to create the volume. Not as bad as it sounds with the ol' copy and paste. But the process humbles me at the maginificent original craftsmanship that was involved in making the original physical garments.
Other DAZ products used listed in my DAZ3D Gallery
My you've been busy! I almost missed this update, because Daz doesn't send me email notifications reliably any more.
The level of accuracy and the attention to detail is truly impressive.
nice
Wow, that is an amazing Tudor outfit.
Thank you @Barbult, @Domede, @nonesuch00 and @FirstBastion - nice of you to take the time to comment. I appreciate it. More on the way.
Canterbury
So priketh hem Natúre in hir corages,
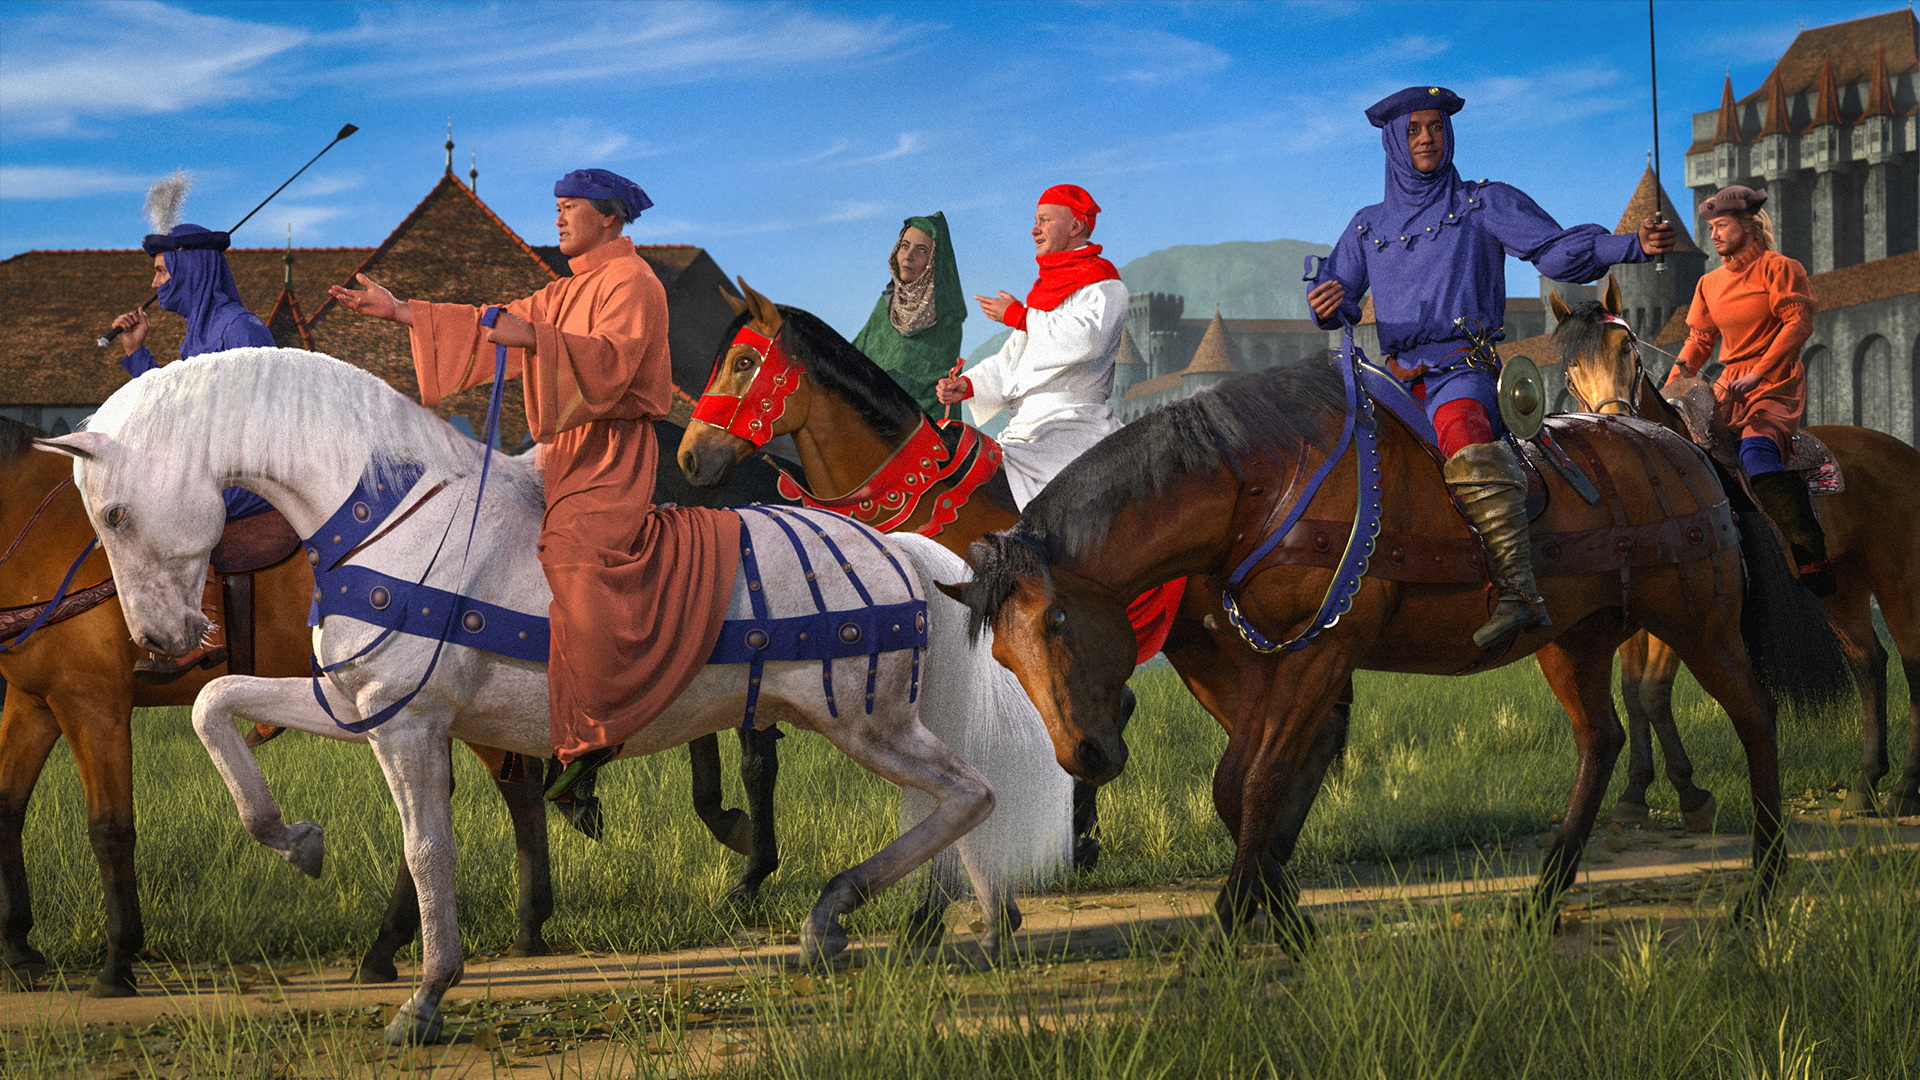
Thanne longen folk to goon on pilgrimages.
This utilized many of the new Marvelous Designer features for the timeline - I did one character, one horse at a time. I keyframed the horse under the character at 0 then rose to meet the character's pose in keyframe 30 to get the draping. I'm having lots of fun simulating with multiple avatars!
Products used in my DAZ Gallery.
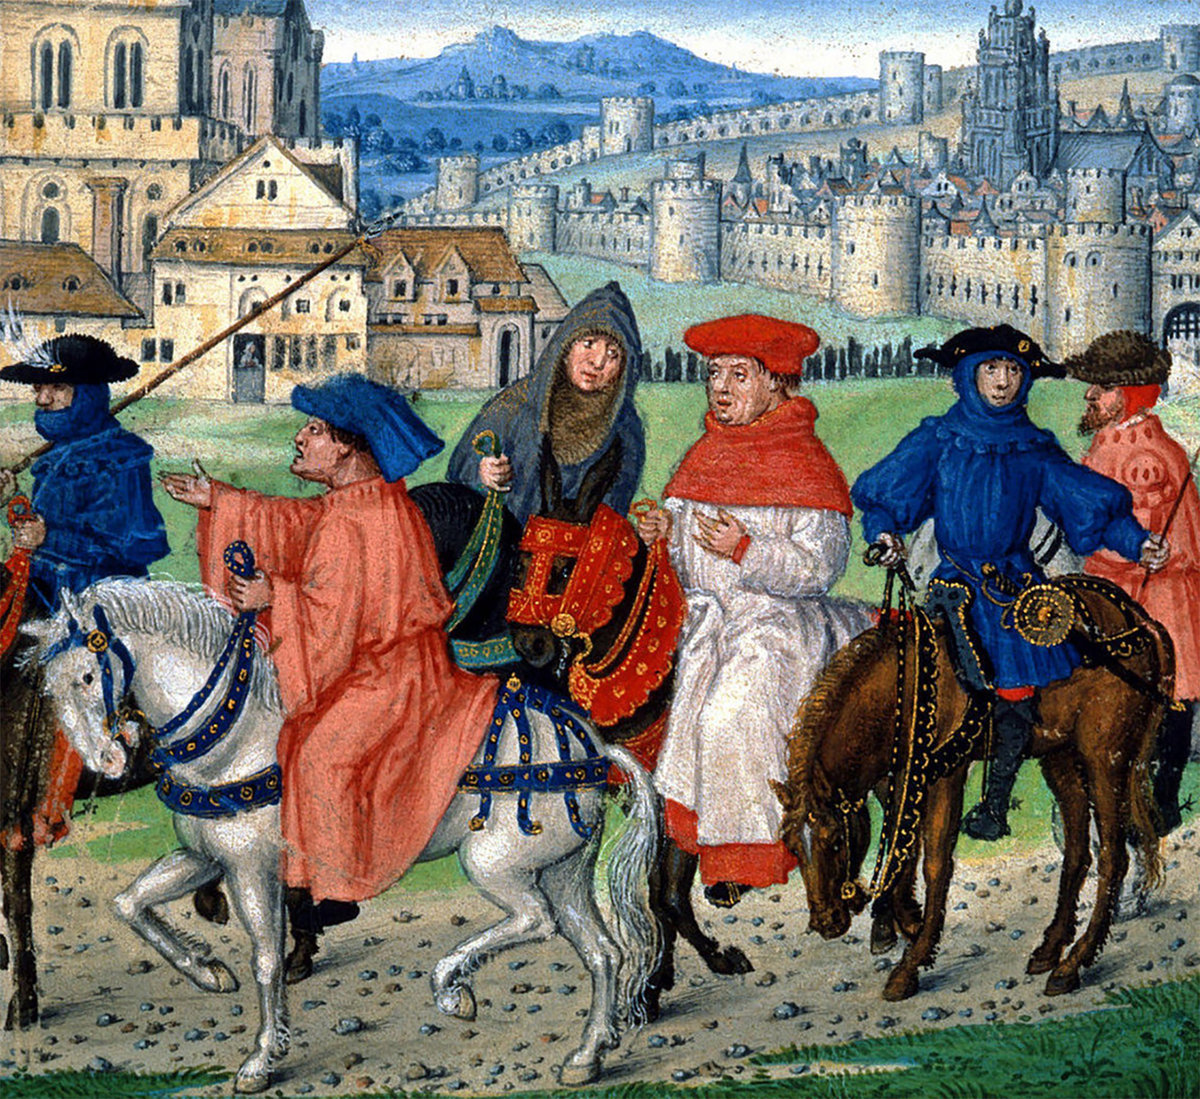
Inspired by the famous illustration by Gerard Horenbout, c.1523.
Magnificent!
Graduation
Wow, hard to believe over a year ago I started on the Marvelous Design journey. Over the last year I've been creating assets for a project I'm working on.
You should sell that graduation gown in the Daz store. It looks great.
Alas, @barbult (and thank you) - I gave it my best shot creating content for the DAZ store. My patterns are just to intricate and Dforce explodes. And rock bottom, I really don't enjoy creating JCMS.
But here is a link to the Marvelous Designer file if you want to use it. The avatar was Michael 8 (removed). Even in MD simulatation is tricky
--> Masters Robe.zprj
Hey, thanks for MD project! I autofit it to a V9 avatar I had and adjusted the particle distance to be not so small. I exported it to OBJ and imported it into DS. I didn't bother to use Transfer Utility to rig it, I just loaded it in the scene with V9 and dForced it on the timeline. Then I applied some shaders. I put a dress under it, because the V neck was a little low on her.
Speaking of not liking to make JCMs, ManFriday's Seamster product makes that process easier. You still have to model each JCM, but the overall process is facilitated by his tool.
The revival of this discussion after a lapse couldn't have come at a better time for me because I'm trying to learn as much as possible about MD before going for a subscription. To my shame, I did take out a year's susbcription at a Christmas discount price last year but the year wore on and other things took priority. About mid-autumn that year I tried to make a start but my learning process was haphazard and I exported only a few .OBJ garments before the subscription expired.
I'm interested primarily in making biblical-style robes which will be draped on posed characters. The characters will be everyday people from that 2000 year era therefore the clothes I need to research and design will be for young and old, male and female.
My learning attempts brought me to this thread via Diomede's excellent thread which provides some fantastic links to learning resources.
Congratulations on all the great design work and wonderful images shown in this thread.
@barbult - Glad you got the robe working - looks great. @Hermit Crab - Yes, MD is one of my favorite programs to work in. What I've found in making robes is to create the various panels in pieces, not try to run it as one continuous piece of fabric which is how, say, a toga would have been draped. Here's an example (avatar removed from file) - Also, you can create "helper" pieces of fabric that are frozen that you can tack to the avatar or cloth, that help keep the garmet in place when needed (the blue frozen 'helper' keeps the drape in place when in A pose)
Toga.zprj
Here are a few images which will make seasoned pattern-makers laugh but I hope might encourage anyone considering a free trial or subscription. If I can come up with something, anyone can.
Ah thanks so much Bohemian3. We were cross-posting and the computer seemed to hang. Here is an amateurish version of a cloth draped over an avatar's arm which I meant to include above.
I can give you my history of MD 'usage' which I could weep over. Many years ago version 2 of MD was given free as a magazine cover CD for perpetual use. All the important stuff such as exporting, saving and such was not included of course. I was too early in my 3d learning to know what a prize I had (I was learning Carrara, Iclone and Hexagon).
A long time after, it was announce that MD would go subscription only. I searched all over the house for that old disc for days and eventually found it fallen behind boxes in the attic. I tried it out again and thought to buy the full version the following day. Too late! The deadline had passed! Anyone reading this has my permission to gloat - I deserve it.
HOWEVER. I can now play to my heart's content learning with that simplified cut-down version of MD. This I will do before shelling out for the full subscription again. I'm saving GIFs and screenshots of everything I do.
Unfortunately, I can't load your very generous file but the image of the pattern is a great gift.
I will try later (someone has arranged to call me in a few minutes.) to upload a gif of what I made today in case it shows a bit more of a novice's fumblings with the software and might be helpful in some way to a newcomer to the program.
Telephone call over!
As mentioned, I've been saving screen-captures and have been saving gif animations of simulations. The gifs may be too big to post (I don't know file size limits) so here are some screenshots only. The pink outfit was based on instructions either from this thread or Diomede's which I read yesterday. Instead of a belt attached to a skirt draped fom a circular plane, I made the belt parts tall enough to cover the torso and added shoulder straps. My big breakthrough in recent days is to have the avatar exported from DAZ studio with animation (as a Collada file). I have the wind object activated.
Attached also is another robe and cape I tried.
This is about the stage I've reached so far. The progress I'm really glad to have made is that I'm getting to be familiar with the pattern manipulation tools.
The good news for anyone reading this is that I haven't much else to show! Thanks for letting a novice join in.
This is about the last I can offer should any complete newcomer be interested in starting out also.
OOPS! I thought animated gifs worked. Sorry about that. The gif was supposed to show the pattern being simulated.
Just to note, you needn't make everything from scratch, you can utilise and repurpose existing garments:
https://www.artstation.com/marketplace/game-dev?section=trending&hide_ai=true&q=zprj robe
https://www.artstation.com/marketplace/game-dev?section=trending&hide_ai=true&q=marvelous greek
https://www.artstation.com/marketplace/game-dev?section=trending&hide_ai=true&q=zprj ancient