Iray problem

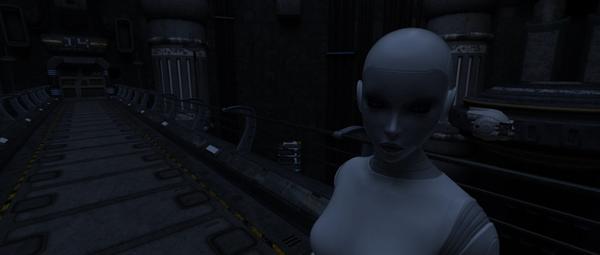
I was trying out the iray feature and it doesn't seem to 'see' metal surfaces/lights. I attached the same picture done in two different renders. The top one in 3Delight and the bottom Iray. The Iray render took over an hour. 3Delight less than a minute.
As you can see, the Iray render seems to remove the metallic chrome on the robot and the lights no longer 'glow' like in 3delight.
Is there a setting to fix that? I messed with a few settings that don't seem to work.
Thanks!

Daz 3D is part of 
Connect
DAZ Productions, Inc.
7533 S Center View Ct #4664
West Jordan, UT 84084
Licensing Agreement | Terms of Service | Privacy Policy | EULA
© 2025 Daz Productions Inc. All Rights Reserved.
Comments
Did you apply Iray shaders to the surfaces? If not Iray may not be reading the surfaces as well as you may want. There are a bunch in the shader preset/iray uber shaders file. What sort of lights did you use? Iray emmisvie does not appear to be on the same spots that glow in the top render.
I just tried applying an iray shader to the figure, but it doesn't seem to work, unless I'm doing it wrong. I also tried to 'merge' an iray shader into the scene.
I used one spotlight to light the scene (figure). Would I have to apply a shader to each surface that's part of the scene? Still. Doesn't seem to be working.
Thanks for the help.
Hrmm.. the metal should have applied to the figure with no issue. If you wanted to retain any bump or displacement you needed to hold down the ctrl key. If there is a map in diffuse and you add a color that may make it a bit squirly.
Be sure your adding the correct kind of light. None of the 3delight lights will really work properly with iray so you need to be sure to use the photometric spotlight. That can also be used as a "mesh light" by changing it from point to one of the shape options. The size is adjustable and a larger size will give you softer shadows.
If the space is enclosed then your going to need lights that fill the space. You may need more than one photometric light. If the "glowing lights" are a separate surface you can change the material to emisive uber iray shader. You may want to change the color temp on that to 5500 or 6000 to have it be similar to the color in the first image.
Make sure you have the surfaces selected when applying the shader. The Shader displayed on theSurfaces pane should say "Iray Base Shader".
For metal surfaces in IRay, first select the surface and apply IRay Uber Base shader.
Then you can turn up metallic to make it behave more like metal, or if it is a plain surface without other texture elements in it, apply one of the IRay metal shaders. I did a little test in IRay using a car. One is just the default 3Delight shaders autoconverted, the other has IRay shaders on it.
When I select the surface on the figure, the Uber Base Shader doesn't show up. When I deselect it, it's there. I put it on anyway and I get an error if I 'fit to figure'. If I apply 'default', there's no error, but it doesn't seem to be doing anything.
I tried the Nvidia material ball and that works fine when applying shaders.
Might be a Bot Genesis thing because I had the same problem when I imported the figure into Carrara. It wouldn't let me apply any shaders on certain parts of the figure where I should be able to.
I'll keep trying.
Thanks for the suggestions so far!
Use the "Content Library" and navigate to Shader Presets -> Iray Presets
You cannot always depend on smart content, specially for shaders.
I'm encountering the same issue. The object stays white. I select the object, go to the "Content Library" > "Shader Presets" > iray Uber Defaults > Iray Uber Base, and then select a shader from there, but doesn't work.
UPDATE: I figured it out!
It has to be a bug, but the way i was able to make it work was to select the object, then went to the "Surface" tab and clicked on "Editor". I clicked on the arrow next to the name of the object, so that it expanded and selected "Default".
From there, I changed the "Lighting Model" option from "Plastic" to "Metallic". (If you try to change the "Lighting Model" from the object name and not from the "Default", it will not work.
I then reapplied the "Iraby Uber Base" and selected the shaders and worked.
That worked! Thanks, xpiderman!
I pretty much gave up on it before.
Since these are shader presets, you have to select both the object and the material you want to apply the preset to.
Sorry that's coming late, but its an explanation of the behavior. Its not a bug, its the way this particular type of preset works.
Shader presets can be used anywhere on any surface, but you must select the object and the surface you want to apply to.
Material presets are built for a particular model and expect certain surfaces to be available and will only apply to the surfaces that are saved within the material preset.
I guess what threw me is that you have to go into the surface editor (as xpiderman suggested) and click the object part to be shaded from there, not selecting the part from the viewing window. The 3Delight allows for you to 'drop' the material onto the object in the viewing window without going into the surface editor.
You can also use the Surface Selection tool in the viewport.
You're welcome, cd832. evilded777, I thought it was a bug because of what cd832 said. I was used to the way 3Delight works, that didn't think would be different. And thanks for the tip, Richard, that did the trick as well. Sorry for the confusion.
Yes, thanks for the tip, Richard. Didn't see that tool. Slowly learning here.
I only want to apply the Genesis 2 iray optimized preset to the eyes (when applied to the entire figure, it lightens them drastically. Poor Carissa.) I have the eyes selected in Scene and over in Surfaces I have the cornea, Eye Reflection, Irises, etc- the eye parts- selected. But when I click the optimized preset, the entire body changes. How do you get that to work for only certain surfaces? The Scene and Surface thing isn't working.
EDIT: And I already know about Uber Base. But other posts said this Gen 2 Optimized preset was better for the eyes. Don't know if that's true.
You could make a materials preset for just the eyes.....
After you apply the Gen 2 Optimized Preset, open the Surfaces pane and select the Gen 2 character.
Now,with the "Surfaces" pane still open, click File > Save as > Material(s) Preset.Studio will ask you to choose a name for your preset,( I chose "Iray Eye Preset" for mine). Choose a name and click Save.A menu will open with a list of the surfaces.Choose all the eye surface parts (Cornea, EyeReflection,Irises, Lacrimals,Pupils,Sclera, and Tear) by placing a check mark in the box.Anything with a check mark in the box will be saved to your materials preset.Click "Accept" and Studio will save your new preset to your content library under Daz Studio Formats > My Library > Preset > Materials.To use it just select your Gen 2 character and double click your mat preset.
That is an amazing idea! Thank you so much!
Yes, that's probably because it's ignoring your "only eye stuff selected" in the Surfaces tab. Try a <ctrl>-click instead and make sure the top dropdown in the little dialog that appears is set to "Selected". When you just click on the preset, you're stuck with its default settings — which might not be what you want. The optimised preset is defaulted to "apply to all materials", so that's what you get. FWIW, I always <ctrl>-click when I'm converting to Iray.
Thank you SpottedKitty! :) I did a test over on my Art Studio thread testing the Uber Base with and without the OptiX Prime Accelerator, and that's how I got involved with the people iray shader (instead of using the Uber Base.) I did timed tests to see if OptiX was influenced in speed when Uber Base was applied, and if it sped things up, etc. Anyone interested can check the thread as I finished putting the enlarged images in the posts a few minutes ago. I timed it at 3, 5, 7, and 12 minutes.
Appreciate everyone's help.
The nice thing about using the people-specific shader is that it automagically applies things like the Water Thin settings to the eyes, slightly-glossier-than-the-skin settings to finger and toenails, skin-optimised SSS, etc. The Uber Base just uses the same best-guess conversion parameters on all the figure's surfaces. I really wish there was a similar preset for other figures, not just G2F/G2M.