Vertigo ponytail rendering with odd squiggles
 Khoyan
Posts: 72
Khoyan
Posts: 72
I don't know what forum is best to post this question. If this is the wrong one, I'll move it to wherever a moderator points to.
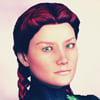
I have an issue with Vertigo Ponytail. Or perhaps with the combination of Vertigo and Sienna HD.
I load Sienna, do some simple and small changes to her morph, load the hair and the right mats, then use dials to make my desired expression. When I render, however, I get some fairly odd squiggles on the model's forehead. They kinda look like dust on a camera lens.
I've tried on another model, and there was no problem. There's no problem when I load the hair on the Sienna model, it happens after I've done adjustments to the morph as well as expressions.
I don't even know where to start to trouble shoot this. Does anyone have any tips?
Daz 3D is part of 
Connect
DAZ Productions, Inc.
7533 S Center View Ct #4664
West Jordan, UT 84084
Licensing Agreement | Terms of Service | Privacy Policy | EULA
© 2024 Daz Productions Inc. All Rights Reserved.
Comments
Not all heads are the same. The Adjust Forehead slider on the hair should allow you to clear up the forehead.
This happens with many hairs. Most hairs have morph sliders that will let you deal with this problem. The worst option is increasing Scale, but sometimes there are no other options.
As Sevrin suggested, dialing up (a little) "head size" and/or "forehead depth" should get rid of those.
Thank you for your suggestions. I've dialed the adjustment for forehead, as well as various head settings to fill out that squiggle space, but now I've dialed so much that the character doesn't really look like what I want, hehe. I'll try some more, but it may be that this morph and this hair just don't go well together like I want.
I tried to reproduce this, but was unable to. This is Sienna HD with Vertigo hair out of the box, except for Sienna's eye colour. Lighting is a mix of HDRI, emissives and spotlights. I used brow compression, eye movement and a slight expression to see if could bring out the squigglies, but they wouldn't show.
It has happened to me that I've had these artifacts appear from one angle but not from another. I don't know what kind of lights you are using, but if they are spotlights, try changing the geometry from point to disc or rectangle with a large size, like 50x50 (50 diameter if a disc) or larger. Lights from a point sources tend to bring out this kind of thing out more.
Some other things to try:
Change "Instance Optimization" in the render settings. Although this turns instancing on/off, for some bizarre reason it also adjusts the transparency settings in the scene. You can sometimes clear up material issues (black eyes, orange skin, hairline pokethru) just by changing it to something other than "Auto".
Turn the scalp surfaces's opacity to 0. Sometimes you can get away with not having it, though other times it'll make the character's head look kind of balding.
Add a smoothing and/or push modifier to the scalp. This will enable the scalp to conform to the head, eliminating pokethru in some cases. You can use a negative value for the push modifier to make it shrink.
You shouldn't need to make any changes to the shape of the model's head, only to the morph settings of the hair.
Another thing to try is to add a Smoothing Modifier (Edit > Object > Geometry > Add Smoothing Modifier) to the hair if it doesn't have one already