Difficulties working with Linear Work flow.
 ZarconDeeGrissom
Posts: 5,412
ZarconDeeGrissom
Posts: 5,412
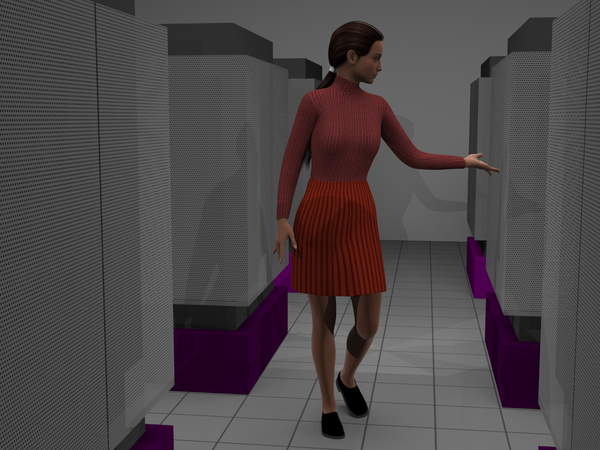
What I'm looking at in the View-field, is Nothing like what gets rendered, what little bit I can make out of the shadows. Is there any way to adjust the lights so the view-field light level matches the render levels, at lest?
The Menu Lights, and the DzLights, both suffer from this.
It is taking hours just to wait for test renders to show the adjustments I make. The kind of adjustments I use to be able to see in the view-field.
I just can't work like this, it has got to be fixed. I need to see what I'm doing.

Daz 3D is part of 
Connect
DAZ Productions, Inc.
7533 S Center View Ct #4664
West Jordan, UT 84084
Licensing Agreement | Terms of Service | Privacy Policy | EULA
© 2025 Daz Productions Inc. All Rights Reserved.
Comments
Well no not really. That is one drawback to a OpenGL viewport that simulates the best it can the Render Engine. If you do not have it on already you can Try Per Pixel Shading on in the Prefs>Inteface and for rendering try Progressive to see if that will give a faster out put of the view you will get.
EDIT: And the Shader Based Lighting will not be simulated in the Viewport as far as I know as it has no OpenGL equivalent that is recognized by our GPU's.
Per pixel shading, is already on. And rendering every micro-transit of the boxes to get them lined up (to make one tower, partly), took me ALL Night, Aghhhhh. As for part colors, forget it.
(edit)
Linear workflow requires the lights to be at 1/3 what they otherwise would be. That is regular cans (DzSpotlights).
Well nothing says you have to work in that method, I never do. Lighting is the Last thing I ever do just because I know once I start I will no longer be able see most of the scene I was trying to set up. I'm not going to stick to anything that slows me down no matter who's method it is or which pro swears its the only method to use. I took enough Graphic Art courses in my life to have learned the only right way to do anything is the way that you do the best. It's not how you get there that matters its the Finished work that matters. I still need Collage credits just because I never took the time to demonstrate that I knew the proper methods but I passed all exam's and graded high for my work. That was the goal in my view, to finish the job and sell.
I wasn't sold on it either, then the plastic skin that wont go away, now this.
I tried four G2F figures there, none of them looked quite right. I figured it was something to do with the light setup, that I just couldn't see what my adjustments were doing.
Now I know why Frank0314 dose not use this config.
You cant use the lighting setup for the "Gamma correction Off", and yet you can't see what your doing to make it from scratch for this. It's worse then Electron-voodoo antennas, it's Audiophile for CG.
If Linear Workflow was all that, wouldn't Daz3D implement a modification for the very lights in the menu, so you could see what your doing?
If you are wanting to arrange content just turn the previews of lights off, reverting to the standard headlamp. Window>Preview Lights.
If you were fighting to get the boxes lined up, did you try the Align pane?
http://wiki.daz3d.com/doku.php/public/software/dazstudio/4/referenceguide/interface/panes/align/start
???
That would be a no. It lacks some documentation. lol
So dose that Align Pane, allow me to set an object an inch back from the edge of another? for example.
Hey zarcondeegrissom, I agree much of the current documentation is useless.
However, There is documentation for the Align tool, altho I don't have a current link to the DS 3 manual.
Hope this helps.
From the DAZ Studio 3 manual (minus figures)
----------------------------
Align Ace
Choose View > Tabs > Align to open the Align tab (also known as Align Ace). This tab allows you to
align two or more selected items to each other, or to a specific coordinate in your scene.
The Options menu contains the following commands:
Reset Options: Choose this option to set all values back to "No Change."
Close: Choose this option to close the Align tab.
There are three different methods used for repositioning objects in the Align tab: Align, Stack, and
Distribute. These options are shown in the figure below.
Aligning Objects
Choose an Align option when you want all objects to be positioned along the same coordinate of one or
more axes. For example, if you have several temple columns that have been placed in your scene
haphazardly, you can use the Align method to place them all in a perfectly straight line.
When you align objects that are different sizes, you can choose to align them on the same side, to their
centers, or to their origins (which, by default are usually at the center of the object). The figure below
shows examples of objects that are aligned along the X-axis and viewed from the Top camera.
How to Align Objects to Each Other
You can use the Align tab to align selected objects to the X, Y, or Z-axis, or any combination of them all.
To align objects to each other, follow these steps:
1. Choose View > Tabs > Align to open the Align tab.
2. Select the objects that you want to align. The first item that you select will be the object that the
others align to.
3. Set the appropriate alignment options in the X-axis, Y-axis, and/or Z-axis sections.
4. Click Apply to align the selected objects.
How to Align Objects to the Grid
To align objects to a precise position on the grid (that is, a specific location in your scene), follow these steps:
1. Choose View > Tabs > Align to open the Align tab.
2. Select the objects that you want to align.
3. Set the appropriate alignment options in the X-axis, Y-axis, and/or Z-axis sections. When setting
the options, check the To Grid option along the-axis or axes that you want to align to a precise
position. You will be prompted to enter a numerical value and choose a unit of measurement.
4. Click Apply to align the selected objects.
Distributing Objects
Choose a Distribute option when you want the sides or centers of your objects to be spaced equidistant
to each other. Again thinking about the temple columns that were mentioned in the Align section, you can
use the Distribute options to space the columns evenly after you align them.
When you distribute objects that are different sizes, you can distribute them in equal distances from any
end, from their centers, or from their origins (which, by default are usually at the center of the object).
The figure below shows examples of objects that are distributed along the X-axis and viewed from the Top
camera.
How to Distribute Objects
To align objects to a precise position on the grid (that is, a specific location in your scene), follow these steps:
1. Choose View > Tabs > Align to open the Align tab.
2. Select the objects that you want to distribute evenly. Select them in the order in which you want to
distribute them.
3. Set the appropriate alignment options in the X-axis, Y-axis and/or Z-axis sections:
To distribute objects so that they are evenly spaced on their end points, choose one of
the options that defines which end point you want to distribute by (Lefts, Rights, Tops,
Bottoms, Fronts, or Backs, depending on the-axis of distribution).
To distribute objects so that they are evenly spaced according to their centers, choose
the Distribute: Centers option from any-axis.
To distribute objects so that they are evenly spaced according to their origin point,
choose the Distribute: Origins option from any-axis.
4. Click Apply to distribute the selected objects.
Stacking Objects
Choose a Stack option when you want your objects to butt up against each other along one or more axes.
The Stack option uses the boundaries of each object as a reference point, and places the boundaries
together with no space between them. Objects are stacked side to side (Lefts, Rights, Tops, Bottoms,
Fronts, or Backs) depending on the-axis you choose to perform the stacking operation.
The figure below shows examples of objects before they are stacked along the X-axis, as viewed from the
top camera. The cone (larger circle) is selected first, followed by the cylinder (smaller circle) and the cube.
Notice that when these objects are stacked to the right or left, that DAZ Studio stacks them in the order
they are selected.
Alignment Options
X-axis Alignment Options
Changes made along the X-axis (which runs left to right) are best viewed from the Front, Back, Top, or
Bottom cameras.
The options you see for X-axis alignment are as follows:
No Change: Choose this option if you do not want to align the objects along the X-axis.
Align: Lefts (-X): Aligns the left edges of the selected objects to the left edge of the first object
you clicked in your selection, or to the grid position you enter.
Align: Centers: Aligns the centers of the selected objects to the center of the first object you
clicked in your selection, or to the grid position you enter.
Align: Origins: Aligns the origins of the selected objects to the origin of the first object you
clicked in your selection, or to the grid position you enter.
Align: Rights (+X): Aligns the right edges of the selected objects to the right edge of the first
object you clicked in your selection, or to the grid position you enter.
Stack: To Left (-X): Stacks objects to the left of the object you selected first, in the order in which
the objects are selected.
Stack: To Right(+X): Stacks objects to the right of the object you selected first, in the order in
which the objects are selected.
Distribute: Lefts (-X): All objects will be spaced evenly based on their left coordinates.
Distribute: Centers: Spaces the objects evenly according to their center coordinates.
Distribute: Origins: Spaces the objects evenly according to their origins (which are in the center
by default).
Distribute: Rights (+X): All objects will be spaced evenly based on their right coordinates.
Y-axis Alignment Options
Changes made along the Y-axis (which runs up and down) are best viewed from the Front, Back, Left, or
Right cameras.
The options you see for Y-axis alignment are as follows:
No Change: Choose this option if you do not want to align the objects along the Y-axis.
Align: Tops (+Y): Aligns the tops of the selected objects to the top of the first object you clicked
in your selection, or to the grid position you enter.
Align: Centers: Aligns the centers of the selected objects to the center of the first object you
clicked in your selection, or to the grid position you enter.
Align: Origins: Aligns the origins of the selected objects to the origin of the first object you
clicked in your selection, or to the grid position you enter.
Align: Bottoms (-Y): Aligns the bottoms of the selected objects to the bottom of the first object
you clicked in your selection, or to the grid position you enter.
Stack: Above (+Y): Stacks objects above the object you selected first, in the order in which the
objects are selected.
Stack: Below (-Y): Stacks objects below the object you selected first, in the order in which the
objects are selected.
Distribute: Tops (+Y): All objects will be spaced evenly based on their top coordinates.
Distribute: Centers: Spaces the objects evenly according to their center coordinates.
Distribute: Origins: Spaces the objects evenly according to their origins (which are in the center
by default).
Distribute: Bottoms (-Y): All objects will be spaced evenly based on their bottom coordinates.
Z-axis Alignment Options
Changes made along the Z-axis (which runs front to back) are best viewed from the Top, Bottom, Left, or
Right cameras.
The options you see for Z-axis alignment are as follows:
No Change: Choose this option if you do not want to align the objects along the Y-axis.
Align: Fronts (+Z): Aligns the fronts of the selected objects to the front of the first object you
clicked in your selection, or to the grid position you enter.
Align: Centers: Aligns the centers of the selected objects to the center of the first object you
clicked in your selection, or to the grid position you enter.
Align: Origins: Aligns the origins of the selected objects to the origin of the first object you
clicked in your selection, or to the grid position you enter.
Align: Backs (-Z): Aligns the backs of the selected objects to the back of the first object you
clicked in your selection, or to the grid position you enter.
Stack: In Front (+Z): Stacks objects in front of the object you selected first, in the order in which
the objects are selected.
Stack: Behind (-Z): Stacks objects behind the object you selected first, in the order in which the
objects are selected.
Distribute: Fronts (+Z): All objects will be spaced evenly based on their front coordinates.
Distribute: Centers: Spaces the objects evenly according to their center coordinates.
Distribute: Origins: Spaces the objects evenly according to their origins (which are in the center
by default).
Distribute: Backs (-Z): All objects will be spaced evenly based on their bottom coordinates.
------------------------
thank you very much! This looks exceptionally useful for dropping rows of Power8's on boards, and setting up the racks of K2600R's.
I just have to find the three seconds to locate the equivalent menu/tab for he thing in Daz Studio 4.6, it has been exceptionally busy here the past three days.
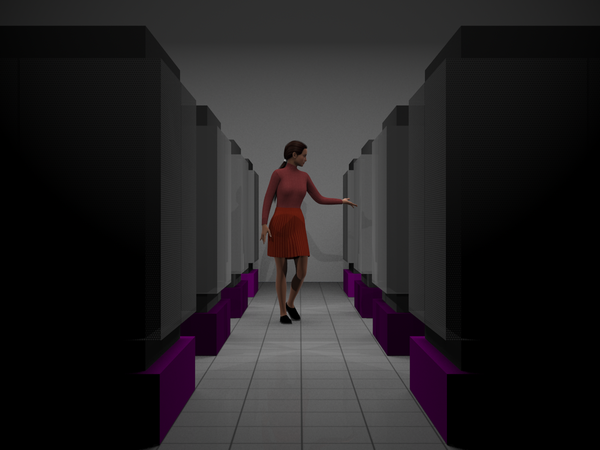
One thing you can try to solve your lighting problem in the viewport is to use an AreaLight - Headlamp Blocker. To get one of these load UberAreaLight Plane from Light Presets -> omnifreaker -> UberAreaLight. This will load the area light plane and the headlamp blocker. Delete the area light plane and leave the headlamp blocker. The headlamp blocker is a fake light that provides lighting in the view port but not in a render.
If you are using a lot of lights, I believe you have to load the headlamp blocker before all your other lights, but the view port will only see the first N lights. If you already have your lights in the scene, you can put them in a group and do Save As -> subscene on just the lights. Then delete the lights from your scene, add the headlamp blocker and add your saved lights back to the scene.
Below I have an example of how this looks in the view port in a room with a bunch of point lights up near the ceiling.
I have been told that the DAZ Studio 3 manual is still a Active link in the Documentation center. That manual has a very good break down of all the functions of many of the tools like Align. They have not changed and the older dox still apply, even the Deformer section still applies as all that has changed in DeFormers is the addition of the Weight map brush.