Creating a sign
 kksmith6515
Posts: 201
Hi Everyone,
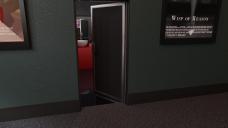
Any suggestions here would be greatly appreciated. I need to create sign indicating that this is a woman's restroom (see pic below). I purchased Maclean's Everyday Signs and Labels but I can't seem to figure out how it works. Could I just make a plane and then somehow insert a jpg image into it?
Thanks!


bathroom door.jpg
1920 x 1080 - 1M


Comments
OK simple sign.
1) Search and download from internet an appropriate sign or create your own (photoshop or whatever) and save it where you can find it. If it is not supposed to be square also create a mask (black where the edges need to be cut off.
2) In Studio Create>New Primative; select plane; about a foot across (whatever size you need)
3) Select the plane and in the surface tab put the graphic you downloaded or create in the difuse tab and the mask in the opacity string tab.
4) Move the sign to where you need it and you're done.
What problem are you having with Everyday Signs & Labels? Did you also download the Templates folder? That shows you where to place your texture for all the different signs.
The best way to go about it would be to choose a sign shape that suits the texture you're using, apply it to the sign, then parent the sign to the door so it moves with it.
Here's a quick render of a couple of signs on a door. (The toilets sign is the morphing sticker)
Marc, first of all, thank you, thank you thank you!!! I knew it had to be fairly simple and your suggestion made the most sense. Ok, I did as you had suggested and it kinda worked. I'm posting a render below. The thing is, I'm not sure why it's so white and washed out but it worked!! So I'm happy.
I'm also going to post a link to the actual image that I used so that you or anyone else can see what it's "supposed" to look like and again, thanks!!!
Maclean, to answer your question, I'm not sure and even if I did, I wouldn't know where that folder is supposed to be. If there is a way to do it using your product that would be great! Perhaps along with the templates, a tutorial or two would be nice. (Just a suggestion)
Link to image: https://www.providenceengraving.com/ADA-Accessible-Women-s-Restroom-Sign-6x8-p/restwacc.htm
If you're rendering that in Iray, check your render settings to see if the Auto Headlamp is switched on - it defaults to "when no scene lights," change it to "never." (personally, if there was a setting for "when they prise the mouse from my cold dead hands," I'd pick that!). The camera is really close to the sign and the headlight is washing it out.
Of course you will need some lighting in your scene, otherwise the render will some out black.
No, Chris actually that's not it unforunately. I did have the headlamp on but when I turned it off the results were the same so I can only conclude that the problem must lie in the surfaces tab somewhere. I just want to get this series finished it has been draging on for months! I might even be willing to spare a couple bucks just to get this problem resovled.
Make sure your light match your render engine; my earlier pictures were 3delight which matches the light in i13's Theatre.
This picture uses iRay engine, eraces all the lights and uses an iRay environment light.
Edit: Be careful with this sign, it is copyright-ed (copywritten?) So for personal/educational use only.
Edit2: This is a default plane, I did not change any other settings. But you might change the Lighting Model to "Matte" instead of "Plastic"
Actually, all my renders were done using the iRay engine Marc. It's just for some reason, the signs in your images appear crisp and clear with bright color and in mine they don't. I can't understand why and I don't think the problem is lighting because everything else seems to be rendering fine.
Ok, so Maclean's product paid off for me in a way. In looking at the surfaces tab on one of his props I realized something. Most of the default settings are the same. The biggest change is that he uses the Defuse Color tab to point to his map so I tried this technique with the plane primative and this is what I got. (see below)
Not bad! The only problem is there seems to be a strange retanglar space appearing next to her leg. I'm not sure what's causing it. Guess it's a problem I could correct post render.
Thanks for all the great advice!!
In 3Delight, the Diffuse Color is where all texture maps go. In Iray, the equivalant is Base Color. Signs & Labels was made before Iray existed, so the textures are all in the Diffuse Color channel.
I'm not sure what that white rectangle is. Maybe you could post a screenshot of your Surface pane settings?
Another thing you might want to do is edit the graphic and add what space around so it is pefectly square. The Mask will eliminate the extra and you won't have to squeeze to get the aspect correct. (set the width equal the height)
then for the mask fill the outer bart black inverse selection and fill the inner with white, and put in the opacity channel.
I don't see any setting in the surfaces tab which says base color.
You'll only see Base Color if you've applied an Iray shader. If you see Diffuse Color, then you're using a 3Delight shader. To get the best results, your shader should match the render engine you're using. But I'm not clear on which one you prefer to render in - Iray or 3Delight.
The first thing to do is look in the Render Settings pane. At the top beside 'Engine' it will say 'Nvidia Iray' or '3Delight'. Choose the one you prefer in the dropdown menu. If you want to use Iray and the sign's surface shows Diffuse Color, then its 3Delight amd you should apply an Iray shader to it. You can do that by going to the folder Presets Shader> DAZ Uber and applying the '!Iray Uber Base'. That converts it to Iray and you'll see the Base Color channel. Click on the arrow and select your texture to add it back in.
If you're using 3Delight and the sign shows Diffuse Color, then that's ok.