Problems modifying a Poser model - can't recreate groups, can't import OBJ properly
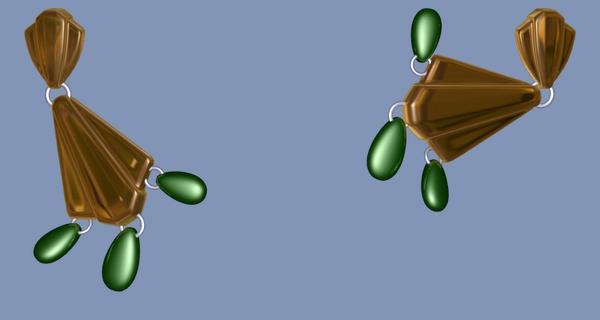
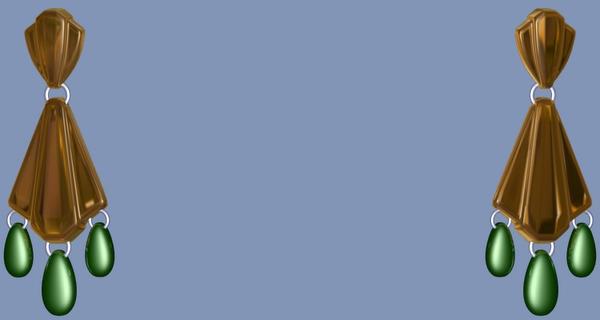
The first of the attached images (Or at least, the one numbered _1; Preview alone doesn't tell me the order they'll appear when I click Post) is of the earrings from the Harmony package. (which is at http://www.runtimedna.com/Harmony-for-Aiko3.html if you want to see) Currently, the model uses three materials; one for the shells, one for the rings, and one for the teardrops. The mesh is articulated, by which I mean that the teardrops and shells can be rotated independently of each other. (I'm not sure if "articulation" is the right term for that; the second image should hopefully indicate what I mean if it isn't)
I'd like to change the mesh to allow the teardrops to be assigned different materials. (Or at the very least, separate them into three pairs) That part, I've managed to figure out on my own; I've managed to learn how to edit the mesh in Hexagon to achieve this, by selecting the relevant faces and assigning them to a custom shading domain. What I haven't figured out how to do is how to do this without losing the ability to use Fit To or losing the articulation.
The original mesh is in an OBJ format and it seems everything but geometry is all contained in the CR2 file; if I import the unedited OBJ via the File menu instead of the Content Library then geometry is all I get. Still, CR2 is plaintext, so I can manage - or at least I could, if Hexagon would cooperate!
Here's what I've tried so far;
1) Importing the OBJ into Hexagon directly - damn-near impossible to get the scale correct. I've found that using a value of 244.5 and units in millimetres is CLOSE, but not enough to satisfy my OCD. On top of that, two of the rings, the ones connecting one shell to its partner on the same side, have their materials set to the Shell domain for unknown reasons; instead of using the Ring material like they should, they use Shell.
2) Exporting the file from Daz Studio as an OBJ (which seems to be the only format common to both programs - they're both Daz products and yet there's only format in common between them? The hell?) and then importing it into Hexagon. Even when I set both to the same units - I use 1unit=1cm in the Daz Export window with a Scale of 100%, and in the Hexagon Import window I set the scale to 1.0 and units to cm - the scale is off by an order of magnitude. And again, two of the rings wind up with the wrong material.
3) Opening the file in Daz Studio, then using Send to Hexagon; using this method exports everything as a single object - where the shells were separate objects, and each teardrop was also a separate object, now there's just a single entry in the Scene palette. Which means that if I save to a new OBJ and then try to re-import it to Daz via an edited CR2 that points to the modified file, it fails to import the geometry, because the object definitions that the CR2 expects to be there don't exist. I have, as yet, found absolutely no way to recreate the original groups.
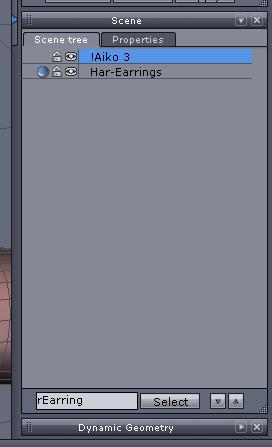
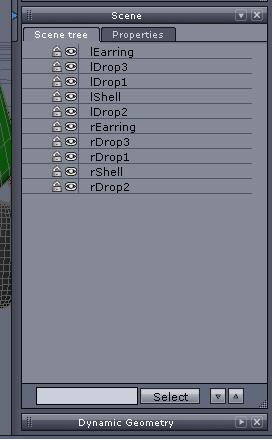
Attached image number 3 shows how the Scene palette should look for the CR2 to work properly; Image number 4 shows how it looks when I use Send to Hexagon. (Aiko 3 was in the scene to give me a point of comparison while I was trying to figure out the right scale setting for importing the OBJ - this was before I noticed the material problem)
If there was some way to separate the model out so as to recreate the original object definitions, I'd be fine; it's easy enough to select the faces for each of these objects separately from other faces. But I've spent the day searching through the documentation and Google to find a way to no avail. Either my search-fu is weak, or this can't be done in Hexagon.
I'm at a loss here. Can anyone point me in the right direction? (I am, of course, hoping that this is a case of "my search-fu is weak" and not "This can't be done in Hexagon")





Comments
Its a Poser Item so Default Poser Import and Export to/from HEX should work. And if you change the Material Zones in HEX you need to save the Edited OBJ file and then make a new UV map. Editing the CR2 to read the New Object file or Renaming the old one To Blah_old and The New one to Blah Should work as long as no Mesh is moved, added to or removed from.
You will also Need to edit the MAT calls in the CR2 file to reflect the new Mat zones you made.
By "mesh" in this context I'm assuming you mean "vertex"... and that is indeed the case.
This is Default POSER import settings for a Loaded Object file see below.
Changing the Material Zones DOES require a new UV map as that is what the UV map is for. Setting the material zones on the Object.
EDIT: The CR2 file Can be setting A SCALE for the object at load, changing the object size in HEX at load causes the point records in the CR2 to not match and that is why the edited file will not load. Also be sure you change all calls to the object file and all calls to the Mat zones in the CR2 file.
Okay, this is helpful information.
We seem to be using different meanings for the term "material zone", though; the UV map isn't changing for me. Each vertex still maps to the same point on the UV map as it did before.
Your information about the CR2 setting a scale is very helpful; hadn't considered that possibility. Indeed, it seems that is the case, as it loaded with the correct scale when I imported the original OBJ and then immediately exported (without edits) to the second file. However, this still doesn't solve the problem of materials.
The attached image should illustrate this problem. Any suggestions?
Let me reiterate; all I've done here is to load the original, unedited OBJ into Hexagon, export it with the same settings with a new filename, and then load it into Daz Studio from a CR2 modified to point to the new filename rather than the old. I edited the Diffuse colour in Daz Studio before I rendered, to show the different materials. (Shell has a Diffuse of #00FF00, Rings is #FF0000 and Teardrops is #0000FF) The mesh hasn't been modified in any way in Hexagon.
If I understood you correctly this should be of use:
1. Load your earrings
2. Change your DrawStyle so you can see the geometry of the earrings by clicking on little ball icon next to (on the right) "Perspective view" in your viewport and pick Wire Shaded"
3. Select you earrings, go to Tools menu and pick Polygon Group Editor
4. Click on the teardrop to select 1 polygon, than click with right mouse button on the screen and in the menu go to Polygon Selection - Select All Connected. If polygons from just the tear gets selected thats ok. If tear and something else gets selected, you can remove from selection polygons that you dont want by pressing and holding ALT key on keyboard and clicking on unwanted polygons to deselect them. CTRL + clicking on polygons adds to selection (or ctrl and mouse click and drag the mouse), ALT + clicking on polygons removes from selection. If there are to much polygons that has to be removed, you can click on 1 polygon again to select just 1 again, than press and hold CTRL and press "+" key on num keyboard to grow / expand the selection as much as you can and than use CTRL and mouse click to add additional ones. There is also lasso and rectangle mode of selection (click with right mouse button on the screen and in menu go to Mode) so you can use that modes to select as much polygons as you can, than switch back to drag selection mode and add additional polygons by CTRL clicking on them.
5. After you have selected desired surfaces, click with right mouse button in the view port and in the menu go to Polygon Assignment - Create Surface from Selected... Enter name for your new surface and press accept. And now you should have your newly created surface listed in surface tab for earrings.
6. After you are done with making your new surfaces you can save earrings as support asset - figure/prop assets. If DS doesnt allow you that because of some reason you can do what DS asks you to do (what is missing) or you can save as scene or scene subset and merge it with other scenes.
Oh and return DrawStyle to texture shaded and pick universal tool or some other from tools menu. ;-)
Holy crap.
That was so much easier and faster than what I was trying to do. And unlike what I was trying to do, it worked.
One thousand Internets to Griffindor! Err, I mean bennumbers.
The mesh isn't weightmapped though, so Daz refuses to save it as a figure/prop asset.
In that case you can select the earring, than go to Edit menu - Figure - Rigging - Convert Figure to Weight Mapping, than TriAx Weight Mapping. Than check how the movement of the parts work and save if its ok.
Edit: To add, you can fit the earrings to a figure and try to save them as figure / prop than, instead converting them to TriAx.