What are Transparency Maps?

What is a Transparency Map?
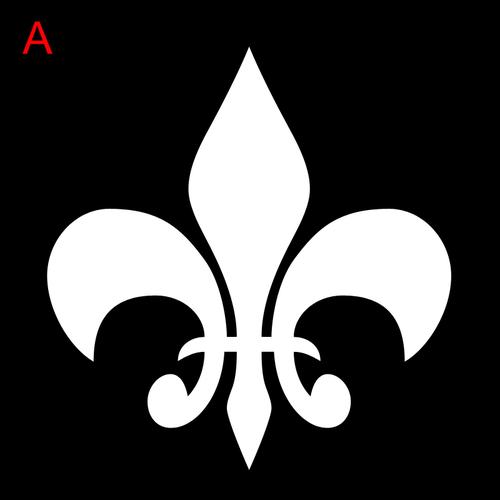
Here in this sample I have a simple plane and I want to make it into a nice shape and hide parts of the plane. In Photoshop and made a square image and filled in with 100% Black (0,0,0). Then with the custom shape tool and made a shape coloured white. Saved the image as a jpg. Refer to image A.
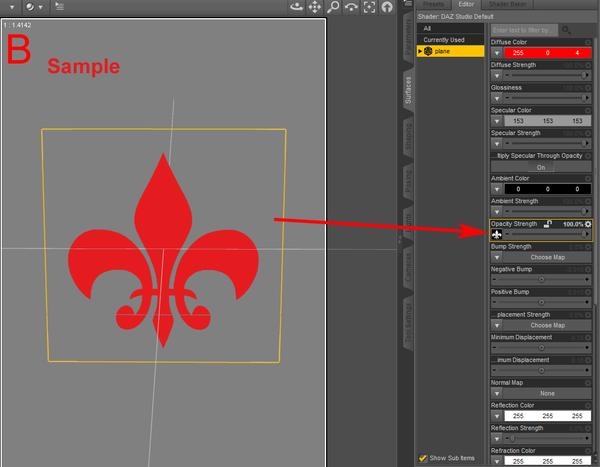
I then loaded a plane primitive in Daz Studio and applied this map in to the Opacity channel. Refer to image B.
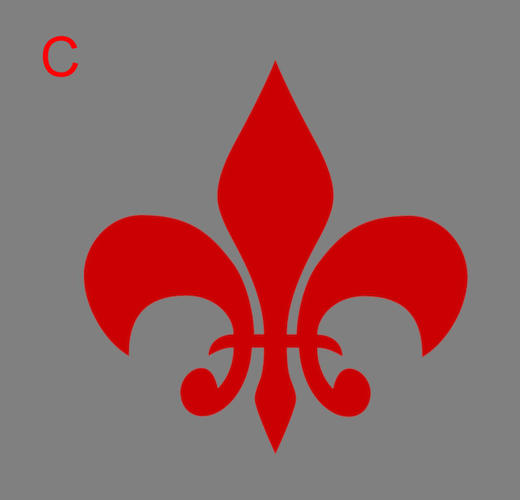
In image C you can see the parts of the plane where the map is white rendered and where the map is black did not render.
Black is fully Transparent and White is Opaque (solid). However Grey (128,128,128) is in the middle of these two being semi transparent.
Daz 3D is part of 
Connect
DAZ Productions, Inc.
7533 S Center View Ct #4664
West Jordan, UT 84084
Licensing Agreement | Terms of Service | Privacy Policy | EULA
© 2025 Daz Productions Inc. All Rights Reserved.
Comments
Part 2
Unlike the Mil Dragon the Sub Dragon doesn’t comes with Transparency Maps for the wings. I am showing how to convert the bump map in a crude trans map for a fellow forum member. Due to the EULA I cannot distribute this map unless I make one from scratch which could be out of my skill set.
Anyway I am using Photoshop CS2 but GIMP or any other image software that has layer capabilities will do the job.
1: Find the Sub-D Wings bump map and load it in to PS. Duplicate the layer and “Invert” the duplicate.
2: Select the Polygonal Lasso tool and carefully trace around the edges of where the bones are.
3: Once you complete the loop you can then right click and Layer via Copy. This will copy the selection to a new layer. Repeat until all four wings are done.
4: Select all the 4 layers you just made and Merge then in to one layer.
5: Hit Ctrl + U to get the Hue and Saturation adjustment window up and set Lightness to 100%. This should make the new merged layers white. Then duplicate this layer as a backup.
Part 3
6: Next I painted in more white where the wings meet the body. I then applied about 3% Gaussian blur. You will find Blur under the Filter Menu. The last thing I did was to select the Inverted layer and reduced the opacity down until you get a mid grey.
7: In Daz Studio select Wing top and bottom and place you new trans map in to the Opacity Channel.
8: see how the wings are now semi transparent.
Thank you, thank you, thank you !! *give hugs*
You already know it, but hey... it's worth another go of thank you's *smiles*
LOL no problem
Saving for later. I see lots of uses for this thank you!
Great for Iray too, using the Translucency Channel
Thank you so much. You are the first person that dose'nt speek geek, and explains things in human.
Thank you.