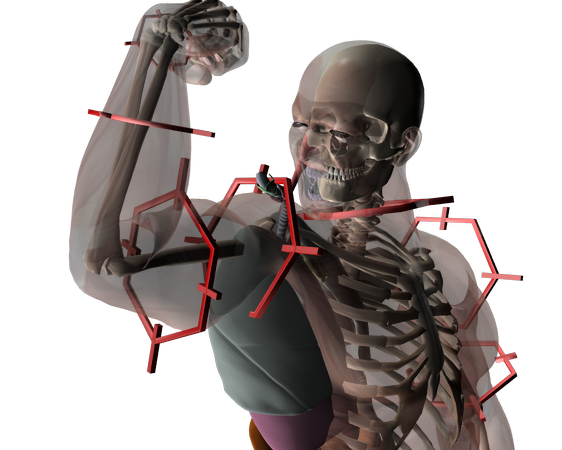
How to sync skeleton, guts with model and hide skeleton red rings in render?
1.) I'm using the M4 skeleton and guts models. I want to have the skeleton and guts synced to the same pose as the m4 model. I did an Edit->copy->copy figure on the m4 model, then on the guts and skeleton I did Edit->paste->paste figure pose and Edit->paste->paste figure shape
However the result isn't quite right and things don't line up. For instance the guts trachea is outside the m4 body entirely and the skeleton eyes don't match the m4. How do you fix that?
2.) Also in the final render, the red rings around the skeleton are still visible. How do you hide those?


muscle_low_res_not_synced.png
562 x 450 - 252K
Post edited by whitefrozenturkey on


Comments
I found that it almost works if I start with a blank pose and use the 'fit to' function.
However, it still has the problem of the skeleton kneecaps and feet not lining up with the m4 model. Is there any way to fix that?
Also, how do I remove the red rings from the render?
If I remember correctly you need to conform M4 to the skeleton, not the other way round.
When I conform M4 to the skeleton it still gives a strange shape to the feet and the skeleton kneecaps show through the skin.
I can't help with the skeleton as I don't have it but for the rings is there a preset to hide them? Or in the scene pane, can turn off the little eye or youi can set the opacity to 0% in the Surfaces Pane.
I don't have the M4 skeleton either, but I have the M3 one.
If you use the Surface Selection tool to select one of the red rings, and go to the Surfaces pane, you should see it highlghted. On the M3 skeleton they are called 'Helpers', and you can turn down the Opacity slider to zero.
The handles are named for the body parts they control - lCollar, lShoulder etc. - and can be turned off via the visibility setting (the eye in the Scene pane or the Visible button in Parameters). I suspect some of your other issues are related to the morphs - have you used the morph transfer to get the M4 morphs you are using into the bones and organs (not that you necessarily want all the morphs to transfer, but you can always turn Show Hidden properties on by right-clicking the Parameters pane's tab and then zero the ones that shouldn't carry over in the conformers). The morphs may well be the reason that conforming the human to the bones doesn't work - the transfer doesn't work in that direction.
Thanks, I was able to get it to work
How do you sync the brain with the model? It's a prop so it doesn't seem to act the same way as the other models?
If the brain is a prop, it will need to be 'Parented'. Put it where you want it to be (probably the head?), then right click on the brain and change the parent to the head. It iwll then always move with the head to any position.
That works great, thanks!
I'm having problems getting the brain to align with the skull correctly. The front lobes are sticking through the bone in the forehead. The steps I've taken:
- add ds skeleton to brand new scene
- in parameters, zero skeleton figure
- add brain attachment to scene, this seems to put it as a child of the skull automatically
I've attached a screenshot of what it's doing and the scene structure. Is there any way to manually align the brain?
Try reducing the Z Scale on the brain a bit - you may need to enable the display of hidden parameters for that, right-click on the Parameters pane's tab.