madisonx's Renders
Hey all,
I'm going to post a few renders here to try to get some feedback on improving my work.
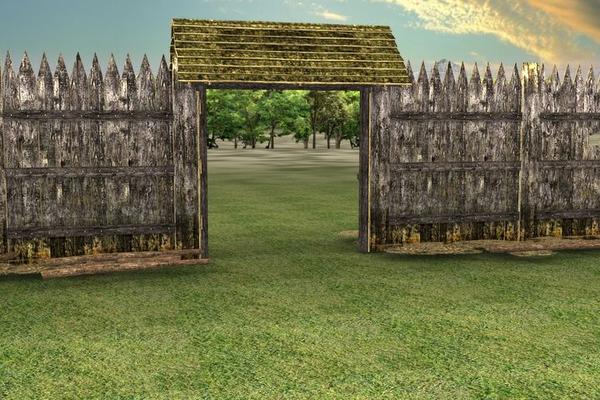
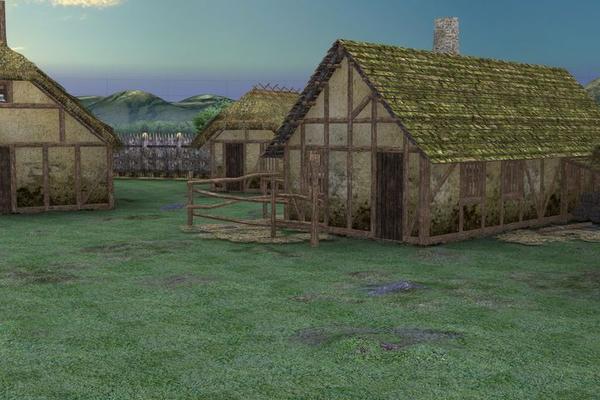
I'm going to start with a few outdoor renders of some buildings. I am using Worldbase-XT here along with Lantios Core Lights 1. I think these came out ok, although the render times were long (longer than I would like, 30 minutes) and I can probably do quite a bit of work as far as arrangement of the buildings and framing. I also think I might be able to do more with shadows and lighting.
Let me know what you think.


Ravenwood_Gate_(Day).jpg
720 x 480 - 101K


Ravenwood_Town_Square_(Day).jpg
720 x 480 - 69K
Post edited by madisonx_c5746f56a5 on


Comments
As expected from pre-bought lighting systems, it's hard to fault the final image. You've got nice subtle shadows, and a good even lighting. If you decide to move away from stock lighting systems and work on your own, you can check my post here for some basic tips and a rundown of the 'usual suspects' of lighting.
As for render times, it doesn't surprise me that it took a while. Many lighting rigs are aimed at getting the best possible quality from the image, and while this is great for getting a picture to be proud of, your render times will increase exponentially the more detailed you make it. In general, Daz's default lights render relatively quickly, with perhaps the exception of some point lights. Shader lights like UberEnvironment and UberAreaLight can really slow the render times if used on high quality settings, but also they're the only ones I know of which can add in that lovely ambient occlusion which adds a lot of subtle tones to the final image.
I noticed in Image 2 the Fence that your floating a bit. That set is designed to be Sunk into the ground a bit (until the Edge items, logs ect) are setting on the ground plane. Or you can open the Surface Tab and Turn them off with Opacity set to Zero (0).
Thanks for the tips and information.
Whoops! Good catch!
Here is an interior render. I'm having some troubles working with darker scenes. In this scene, I'm trying to do a dimly lit room, using the new By Candlelight set. For some reason, I keep getting what seems to be a bright ambient light, which leaves things like the rafters fully lit. I have reduced the intensity of the candles, to no effect. I have tried loading the included Night ambient lights using UE, but everything is still coming out bright where it should be dark. The only loaded lights are the three candles, and they are just throwing everything into shadow.
I did a second render and added an Ambient Only light, the Candlelight Low Level from the set. It turned out roughly the same.
What am I missing here? Seems obvious but I am at a loss.
The fastest way to see what is happening. Would be to just load the Candle set. Then open each of the Lights in the Scene and select them in the Scene tab and then open the Pramaters and see what the settings are. If the light is UE then check the Surfaces settings. You should be able to adjust anything in the set to get the look your after.
Right, but what should I be looking for? I've tried playing with the intensity of each candle (lowering it) and a few other things, but I'm still getting the same result.
Thanks!
I don't have that set but look for other lights that also load Iike a Distant Light or UE light. That should be the one with the Ambient settings. It looks like the Default is set to high at load time.
If you mean lights already in the scene, there aren't any. Just the three candles, which are impacting the light in their immediate area. Regardless of whether or not I load a seperate UE light rig, I am getting the weird light everywhere.
If you mean lights already in the scene, there aren't any. Just the three candles, which are impacting the light in their immediate area. Regardless of whether or not I load a seperate UE light rig, I am getting the weird light everywhere. Now Thats odd. Is this set your using (the Building) a poser item with poser type textures on it? Sometimes Poser textures have the Ambient setting to HIGH for DS. Check the Surfaces of the Building. If the Ambient is set higher than Zero (0) set it to Zero (0) yourself. Thats all I can think of that could cause this.
Ah ha! I think that was the problem. I'll give it a shot and see.
Thanks!
Your Very welcome, hope all goes well.
Ok the room ambient was the problem. Thanks for that.
Here is an updated test with some more development. I think the ambient I am using here is a bit bright and washes out the candles, so I think I'll lower that a bit.
Looking MUCH better. With some tweaking I can see this being a very good render. Nice work.
Thanks. I'm planning on two versions. A daytime version that is heavily lit through the windows, and a nightime version that is focused on the candles.
Lighting is one of my major weak areas, but I'm learning more with this scene, so that is good.
Thanks for the support.
I have a new version that I will upload later. I think it is coming along much better now. I'm just trying to find the right balance of candlelights and ambient lights. I want it to be bright enough to see any characters I add, but still maintain some dark, quiet corners for shady business deals and the like.
For the daytime version, I plan to douse the candles and focus on lights coming through the windows. Do you guys think it would be best to do a powerful sun light above the building, or several lights directed at the windows? I was thinking I might be able to make several lights angled at each window, so that you will get a nice shaft of light coming through the windows, with shadowy spaces in the gaps.
Here is a new attempt of the tavern at night. I think the shadows and overall lightning are improving. I also changed the angle and composition. Might need to add more candles to increase the light in key areas while maintaining nice, dark corners.
Let me know what you think!
This is looking good. My first try would be just to up the intensity of the lights of the candles you have now. Not much because you would like it to still be candle lit but I think it might work for you.
Thanks for the continued feedback.
Here is a new attempt, same scene (slightly reworked for scale) but in daylight. Trying to achieve the look of a room lit by sunlight through the windows. The room should be fairly bright, but with plenty of nice dark corners away from the windows.
Tried a few methods, not having much luck. I have used a UE light set from Lantios, with spotlights focused on some of the windows to represent sunlight coming through. I am having trouble with the UE though...when I just run it with the spotlights, I get a nice mix between the lit windows and the shadowed spaces between them. When I add UE for detail, I tend to just wash the whole thing out.
I wish I could just put a 'Sun' the the sky and get the effect I want, but I can't seem to figure that out. Maybe I should do a light plane that covers each window or something? Hm...
Any suggestions?
Thanks.
With Lat lights do this. OPEN them in your sceen tab, you will normaly see one or more Normal lights and the UE. Select the Normal light and adjust it in the Pramaters tab as normal. The UE lights work as Shaders so do this. Select it and open it in your Surfaces tab. Then you can also adjust it pretty much like any other light.
For a Single SUN just Create a Distant Light and adjust it. Tip LOOKing Through a LIGHT helps it is done in the same way as looking through a different camera.
I hope this helps you some.
Thanks for the tips, I will try that out.
And now for something completely different...a character portrait!
I think this has turned out ok, especially considering that it rendered very fast. I'm sure I could pump up raytracing and some other settings, but I wanted to keep the render time fast.
Anyone have any advice for improvements here?
Thanks!
Here is a new version of the portrait. I changed the skin to Bree so that I can have a no-eyebrow option (wish that was standard with all skins!), upgraded to Interjection skin and eye shaders, copied the hair settings from Reby Elite hair, and pushed raytracing from 0 to 1,
Certainly an improvement, but I went from 10 minutes to 3 hours! Worth it? What do you think?
Here is an updated version of the same portrait, minus hair for render speed. Also upped the render settings a bit.
I actually kind of like the last render more, I think. Part of that is the lighting, which is a bit brighter and harsher in the more recent render.
Anyone see room for further improvement?