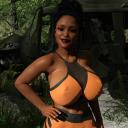
Weird "geometrical" shadows behaviour on materials
 Alien Alloy
Posts: 181
Evening folks.
Sorry if this questions has been answered many times ... but what the heck?
As you can see from the attached picture, on the curve of the bra of this busty lady, there are those pretty werd and sharp shadows.
The scene has no light but a dome an and HDR light in it. I did try to let it render for an hour or so, but it just got less grainy and the shadows keep very geometrical like that.
Could it be I am missing a setting in the clothing, some smoothing parameter maybe?
Any clues?


test.jpg
1500 x 1500 - 2M


Comments
Looks like it's supposed to have subD applied, but doesn't. Also, change the scale of the haircap slightly to get rid of those squiggles on her forehead.
I did notice the issue, it just appeared while applying some face expression.
How do I adjust the subD thingy?
In the Parameters there are two that have subD.
1) View SubD Level (set to 1)
2) Render SubD Level (Minimum) (set to 2)
What tool do you have selected when you render? Hit Alt+Shift+U and try rendering again.
I think I had the arrow one, the node selection tool, and then the surface selection tool.
I did the Alt+Shift+U, it selects the universal too, hit render, nothing changed, same pattern
Is that an Iray render? Check your Texture Compression Threshold values in Render Settings - Advanced. If they are 512 for Minimum and 1024 for High, try doubling each one, and then again if that's not enough.
Indeed Iray.
I've double the amount to 1024 - 2048
No changes in the render, same result
It's the damn bump map ...
The moment I reduce it to 0, no more jagged edges and weird shadows.
Now how to fix that I suppose!
It's the damn bump map ...
The moment I reduce it to 0, no more jagged edges and weird shadows.
Now how to fix that I suppose!
Check that the Bump Map's gamma is set to 0.0 in Image Editor. Click on the micro-thumbnail on the Base Bump parameter and choose Image Editor near the top of the list. (Not Layered Image Editor, plain Image Editor). Image Gamma is at the top of the dialog. Black and white images like bump, weight maps, etc., should all have gamma 0.0. You might need to Refresh Images (ctrl-i) to get it to take effect.
Which outfit is that, anyway? Maybe someone else can verify.
https://www.daz3d.com/ajc-im-so-fitness-outfit-for-genesis-8-females <- This one.
Now I'm gonna try what you suggested :)
That's interesting! So Iray handles controlmaps very differently than 3DL then. As a rule of thumb, with 3DL the diffuse/base color maps should have gamma 0 and controlmaps gamma 1. (With rendersettings gamma 2.20 and gamma correction on)
Wait. I think I got that backwards. Bump maps should be gamma 1.0, colour bitmaps would be gamma 0.0 (which actaully lets Iray decide, or something like that).
Edit: Yeah, Sven, I corrected myself before your post showed up. (Still got that 5 minute lag)
Okey ...
I found the setting and I dragged down to 0.0. I don't know where I have to do the refresh of the image, so I did the ctrl+i everrywhere. I even saved and re-loaded the project.
Changed nothing:( same issue
This is the setting I got.
It's the same on the shorts (of the same set)
Same issue with the darn shadow, all square.
Refresh Images is a right-click on the Surfaces tab, so with the surface selected it would reload it instead of using the cached version, but Studio should realize that something has been changed anyway.
In the Parameters tab, check that General -> Enable Smoothing is ON. Maybe bump up the number of smoothing iterations one at a time. Check General -> Resolution Level -> High Resolution, maybe increase Render Subd Level (doubles the number of polygons every step, so go easy).
Check that Smooth is ON in the Geometry Group in the Surfaces pane. Maybe adjust the Angle to a smaller value (usually loads at 89.9 by default).
Nuclear option: restart Studio and the scene to see if it persists.
I tried all those before writing here actually.
The only one that was left is the change in Smoothing angle, but no results there as well.
The moment I dial the bump map down to 0.0 it's perfect.
I even tried using the normal map, but with the same issue sadly.
How does it look on a more, ah-h, petite form?
Doesn't seems that the size matter.
How the heck a bump map can produce such "artifacts"?
And this is the original without bump map.
Maybe the bump map has a slight square pattern bias baked in. Not much you can do about that. Do you have a product that has a similar mesh bump map? You can change it to see what happens. I know Denki Gaka and Mattymanx have some all-purpose bump and displacement maps in a couple of their shader sets.
Can you get by with less bump? Like maybe half? Or just enough to show the texture. I see in the promos that it looks like some kind of weave.
I will do more test tomorrow.
Now it's 3 am and I'm dead inside.
I did try so far to reduce the bump.
The model, loaded as it is, is set to 2.0 - reduced to 1.0 and 0.5, nothing changes, the weird pattern is still there.
Tomorrow I'm gonna try to load a basic G8 with that top and render it, see if MAYBE is something wrong in my render settings or the enviroptment, but it's weird it's only on that piece of clothing.
I will also test out an hand made weave like texture or something close. Worst case scenario I will do a postwork in photoshop and try to match it.
I hope the client won't be too troublesome!
Good luck. I am out of ideas...
After a buttload of tests I figure it out.
Somehow is the HDR image on the dome that produce that sort of weird shadows.
I loaded a default figure, default clothing and kept the same lighting, produced the same shadows.
Removed the HDR picture, and the shadows were gone.
Does another HDRI behave properly? Maybe bumping up the Environment Lighting Resolution in Render Settings might help. I never play with that, it is usually handled by the preset.